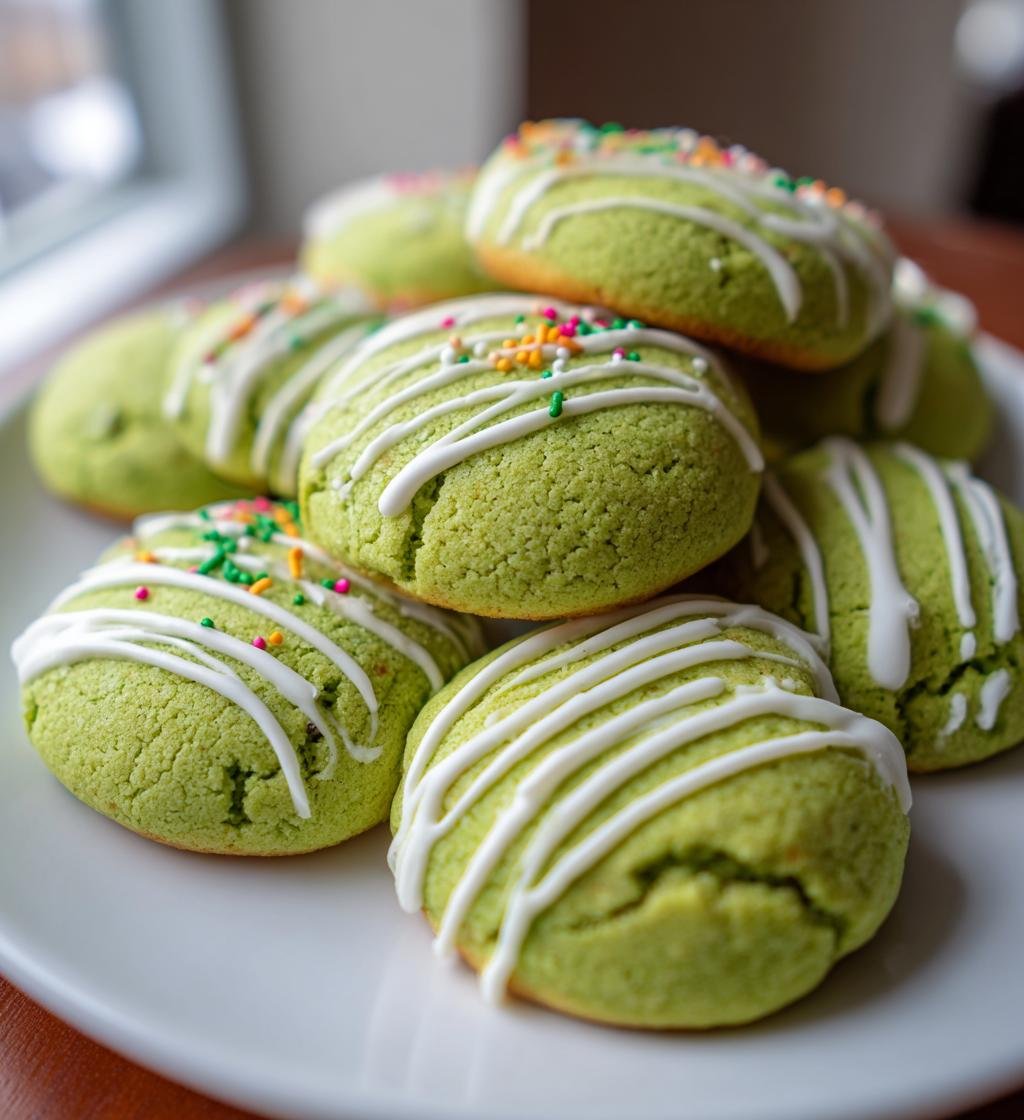
I absolutely love baking festive treats for St. Patrick’s Day! There’s something so magical about creating colorful cookies that fill the kitchen with warmth and cheer. These *st patricks day cookies* are not only vibrant and fun, but they also bring a sense of joy to any celebration. I remember the first time I made them for a neighborhood gathering, and the smiles on everyone’s faces were priceless! Trust me, this recipe is as easy as it is delightful, making it perfect for both seasoned bakers and newcomers alike. You’ll be amazed at how quickly these cookies come together and how they’ll become a favorite for your St. Patrick’s Day festivities!
Ingredients List
Alright, let’s gather everything you need to whip up these delightful *st patricks day cookies*! Here’s what you’ll need:
- 2 cups all-purpose flour: This is the backbone of your cookies, giving them structure and that classic cookie texture.
- 1/2 cup unsalted butter, softened: Make sure it’s soft so you can cream it easily with the sugar, creating that rich, buttery flavor.
- 1 cup sugar: This sweetens your cookies and helps achieve that lovely golden-brown edge.
- 1 large egg: It binds everything together and adds moisture.
- 1 tsp vanilla extract: This adds a warm, sweet aroma that complements the other flavors beautifully.
- 1/2 tsp baking powder: This little guy helps your cookies rise and become fluffy!
- 1/2 tsp salt: Just a pinch enhances all the flavors and balances the sweetness.
- Green food coloring: This is the fun part! Add as much or as little as you like for that festive green hue.
- 1 cup icing sugar: For that sweet, glossy drizzle on top.
- 2 tbsp milk: This helps you achieve the perfect icing consistency.
With these ingredients, you’re all set to create some cheerful cookies that will brighten up any St. Patrick’s Day celebration!
How to Prepare St Patricks Day Cookies
Now that we have our ingredients ready, let’s jump into the fun part: making these delightful *st patricks day cookies*! I promise, it’s a straightforward process that’ll have your kitchen smelling amazing in no time. Here’s how to get started:
Step-by-Step Instructions
- Preheat your oven: Set it to 350°F (175°C) so it’s nice and hot when your cookies are ready to bake.
- Cream the butter and sugar: In a mixing bowl, combine the softened butter and sugar. Beat them together until the mixture is light and fluffy, about 2-3 minutes. This step is super important for that perfect cookie texture!
- Add egg and vanilla: Crack in the large egg and pour in the vanilla extract. Mix them together until everything is well combined.
- Combine dry ingredients: In a separate bowl, whisk together the all-purpose flour, baking powder, and salt. This helps ensure even distribution of the leavening agent and salt.
- Mix wet and dry ingredients: Gradually add your dry mixture to the wet ingredients. I like to do this in batches, stirring gently until just combined. Don’t overmix, or your cookies might turn out tough!
- Add the fun color: Now it’s time to make them festive! Add your green food coloring, a few drops at a time, mixing until you reach your desired shade of green. Get creative!
- Shape the dough: Roll the dough into small balls, about 1 inch in diameter, and place them on a baking sheet lined with parchment paper. Leave some space between them, as they’ll spread a bit while baking.
- Bake the cookies: Pop them in the oven and bake for 10-12 minutes, or until the edges are lightly browned. Keep an eye on them, as every oven is a little different!
- Cool completely: Once baked, let the cookies cool on the baking sheet for a few minutes before transferring them to a wire rack. They need to cool completely before icing.
- Prepare the icing: In a bowl, mix the icing sugar with the milk until smooth. Drizzle this sweet glaze over the cooled cookies for that perfect finishing touch!
And there you have it! These steps will lead you to a batch of beautifully vibrant cookies that are perfect for celebrating St. Patrick’s Day with family and friends. Enjoy the baking process – it’s all part of the fun!
How to Prepare St Patricks Day Cookies
Now that we have our ingredients ready, let’s jump into the fun part: making these delightful st patricks day cookies! I promise, it’s a straightforward process that’ll have your kitchen smelling amazing in no time. Here’s how to get started:
Step-by-Step Instructions
- Preheat your oven: Set it to 350°F (175°C) so it’s nice and hot when your cookies are ready to bake.
- Cream the butter and sugar: In a mixing bowl, combine the softened butter and sugar. Beat them together until the mixture is light and fluffy, about 2-3 minutes. This step is super important for that perfect cookie texture!
- Add egg and vanilla: Crack in the large egg and pour in the vanilla extract. Mix them together until everything is well combined.
- Combine dry ingredients: In a separate bowl, whisk together the all-purpose flour, baking powder, and salt. This helps ensure even distribution of the leavening agent and salt.
- Mix wet and dry ingredients: Gradually add your dry mixture to the wet ingredients. I like to do this in batches, stirring gently until just combined. Don’t overmix, or your cookies might turn out tough!
- Add the fun color: Now it’s time to make them festive! Add your green food coloring, a few drops at a time, mixing until you reach your desired shade of green. Get creative!
- Shape the dough: Roll the dough into small balls, about 1 inch in diameter, and place them on a baking sheet lined with parchment paper. Leave some space between them, as they’ll spread a bit while baking.
- Bake the cookies: Pop them in the oven and bake for 10-12 minutes, or until the edges are lightly browned. Keep an eye on them, as every oven is a little different!
- Cool completely: Once baked, let the cookies cool on the baking sheet for a few minutes before transferring them to a wire rack. They need to cool completely before icing.
- Prepare the icing: In a bowl, mix the icing sugar with the milk until smooth. Drizzle this sweet glaze over the cooled cookies for that perfect finishing touch!
And there you have it! These steps will lead you to a batch of beautifully vibrant cookies that are perfect for celebrating St. Patrick’s Day with family and friends. Enjoy the baking process – it’s all part of the fun!
Why You’ll Love This Recipe
- Super easy to make: This recipe is straightforward, so even if you’re new to baking, you’ll be whipping up these cookies in no time!
- Vibrant colors: The bright green hue makes these cookies a delightful addition to any St. Patrick’s Day celebration, instantly bringing a festive atmosphere.
- Deliciously sweet: With a perfect balance of buttery goodness and just the right amount of sweetness, these cookies are bound to satisfy your cravings.
- Customizable: Feel free to experiment with different colors or toppings! You can make them uniquely yours by adding fun sprinkles or different flavors to the icing.
- Perfect for sharing: These cookies are great for gatherings, school events, or simply to brighten someone’s day! They’re sure to bring smiles all around.
Tips for Success
To make sure your *st patricks day cookies* turn out perfectly every time, here are some handy tips and tricks that I’ve learned along the way:
- Use softened butter: Make sure your butter is at room temperature before you start. This helps it cream nicely with the sugar, creating that fluffy texture we all love!
- Don’t skip the chilling: If you find your dough is too sticky to roll into balls, pop it in the fridge for about 30 minutes. Chilling helps the cookies hold their shape better while baking.
- Watch the baking time: Keep a close eye on your cookies as they bake. Ovens can vary, and every minute counts! You want the edges to be lightly browned but the centers should still be soft.
- Let them cool: Allow your cookies to cool completely on the wire rack before icing. This prevents the icing from melting into the cookies and helps it stay beautifully drizzled on top!
- Experiment with colors: Don’t hesitate to play around with the green food coloring! You can mix in other colors for fun designs or themes. Just remember, a little goes a long way.
- Store properly: Keep your cookies in an airtight container at room temperature to maintain freshness. They’re best enjoyed within a week, but good luck keeping them around that long!
With these tips in your back pocket, you’ll be a cookie-baking pro in no time! Enjoy the process and the delicious results!
Variations
One of the best parts about baking *st patricks day cookies* is how easy it is to get creative! Here are some fun variations to inspire your next batch:
- Different Colors: While green is the star of the show, you can easily switch things up! Try using different food coloring to create cookies in shades of gold, blue, or even a rainbow effect for a whimsical twist.
- Flavor Infusions: Want to kick it up a notch? Consider adding a teaspoon of almond extract or lemon zest for a fresh flavor boost. These little additions can elevate the taste and make the cookies even more delightful!
- Chocolate Chip Surprise: Who doesn’t love a classic chocolate chip cookie? Toss in some mini chocolate chips for a sweet surprise in each bite. The combination of chocolate and buttery cookies is simply irresistible!
- Nutty Goodness: If you’re a fan of nuts, try adding chopped walnuts or pecans into the dough. The crunch adds a lovely texture and rich flavor that complements the sweetness beautifully.
- Decorative Toppings: Get creative with your icing! Add sprinkles, edible glitter, or even drizzle melted chocolate over the top for an extra special touch. You can also use themed cookie cutters to create fun shapes!
- Different Icings: Instead of the classic icing, why not try a cream cheese frosting or a lemon glaze? Both add a delicious twist and can be flavored to match your cookie colors.
These variations not only keep things interesting but also allow you to personalize your cookies for any occasion. So, let your imagination run wild, and enjoy the process of making them uniquely yours!
Storage & Reheating Instructions
Once you’ve baked and drizzled your beautiful *st patricks day cookies*, you’ll want to keep them fresh and tasty! Here’s how to store and reheat them for the best experience:
- Storing: Place your cookies in an airtight container at room temperature. This helps them stay soft and delicious for up to a week. If you want to keep them even longer, you can freeze them! Just make sure to layer them with parchment paper and seal the container tightly.
- Freezing: To freeze, let the cookies cool completely first. Then, pop them in a freezer-safe bag or container. They can last for about 2-3 months in the freezer. When you’re ready to enjoy them, simply thaw them at room temperature for a few hours.
- Reheating: If you prefer your cookies warm (who doesn’t?), you can gently reheat them in the microwave. Just pop one on a plate and microwave it for about 10-15 seconds. Keep an eye on it, so it doesn’t get too hot! Alternatively, you can warm them in the oven at 350°F (175°C) for about 5 minutes to bring back that fresh-baked taste.
With these simple storage and reheating tips, your *st patricks day cookies* will be just as delicious as the day you baked them. Enjoy every bite, whether fresh from the oven or warmed up later!
Nutritional Information Section
Here’s a quick look at the estimated nutritional information for one of these delightful *st patricks day cookies*. Keep in mind that these values are approximate and can vary based on specific ingredient brands and measurements:
- Calories: 120
- Fat: 5g
- Saturated Fat: 3g
- Unsaturated Fat: 2g
- Trans Fat: 0g
- Cholesterol: 15mg
- Sodium: 50mg
- Carbohydrates: 18g
- Fiber: 0g
- Sugar: 10g
- Protein: 1g
Enjoy these cookies as a festive treat, and remember that a little indulgence is part of the fun, especially during celebrations like St. Patrick’s Day!
FAQ Section
Got some questions about making these delicious *st patricks day cookies*? Don’t worry, I’ve got you covered! Here are some common queries and their answers to help you along the way:
- Can I use a different color for the cookies? Absolutely! While green is traditional for St. Patrick’s Day, feel free to get creative with other colors. You can create a rainbow effect or use your favorite shades for any occasion!
- What can I do if my dough is too sticky? If you find your dough is sticky and hard to work with, simply pop it in the fridge for about 30 minutes. This will help it firm up and make rolling into balls much easier!
- Can I make these cookies ahead of time? Yes, you can! These cookies store well in an airtight container for up to a week. You can even freeze them for longer storage. Just remember to thaw them at room temperature when you’re ready to enjoy!
- How can I make the icing thicker or thinner? To thicken the icing, add more icing sugar until you reach your desired consistency. If you want it thinner, add a little more milk, a teaspoon at a time, until it’s just right for drizzling!
- What’s the best way to decorate these cookies? Get creative! You can drizzle chocolate, sprinkle edible glitter, or add colorful sprinkles on top of the icing. The possibilities are endless, so have fun with it!
- Can I add chocolate chips to the dough? Yes! Tossing in some mini chocolate chips can add a delicious surprise. They pair wonderfully with the buttery sweetness of the cookies!
If you have any more questions, feel free to ask! Happy baking and enjoy your festive *st patricks day cookies*!
Print
St Patricks Day Cookies That Will Delight Everyone’s Heart
- Total Time: 27 minutes
- Yield: 24 cookies 1x
- Diet: Vegetarian
Description
Delicious cookies perfect for St. Patrick’s Day celebrations.
Ingredients
- 2 cups all-purpose flour
- 1/2 cup unsalted butter, softened
- 1 cup sugar
- 1 large egg
- 1 tsp vanilla extract
- 1/2 tsp baking powder
- 1/2 tsp salt
- Green food coloring
- 1 cup icing sugar
- 2 tbsp milk
Instructions
- Preheat your oven to 350°F (175°C).
- In a bowl, cream together the butter and sugar.
- Add the egg and vanilla, mixing well.
- In another bowl, whisk together flour, baking powder, and salt.
- Gradually add the dry ingredients to the wet mixture.
- Add green food coloring until desired color is achieved.
- Roll dough into balls and place on a baking sheet.
- Bake for 10-12 minutes or until edges are lightly browned.
- Let cool completely.
- Mix icing sugar with milk until smooth and drizzle over cookies.
Notes
- Store cookies in an airtight container.
- Use more or less food coloring for desired intensity.
- These cookies can be decorated with sprinkles.
- Prep Time: 15 minutes
- Cook Time: 12 minutes
- Category: Dessert
- Method: Baking
- Cuisine: Irish
Nutrition
- Serving Size: 1 cookie
- Calories: 120
- Sugar: 10g
- Sodium: 50mg
- Fat: 5g
- Saturated Fat: 3g
- Unsaturated Fat: 2g
- Trans Fat: 0g
- Carbohydrates: 18g
- Fiber: 0g
- Protein: 1g
- Cholesterol: 15mg
Keywords: st patricks day cookies, festive cookies, green cookies