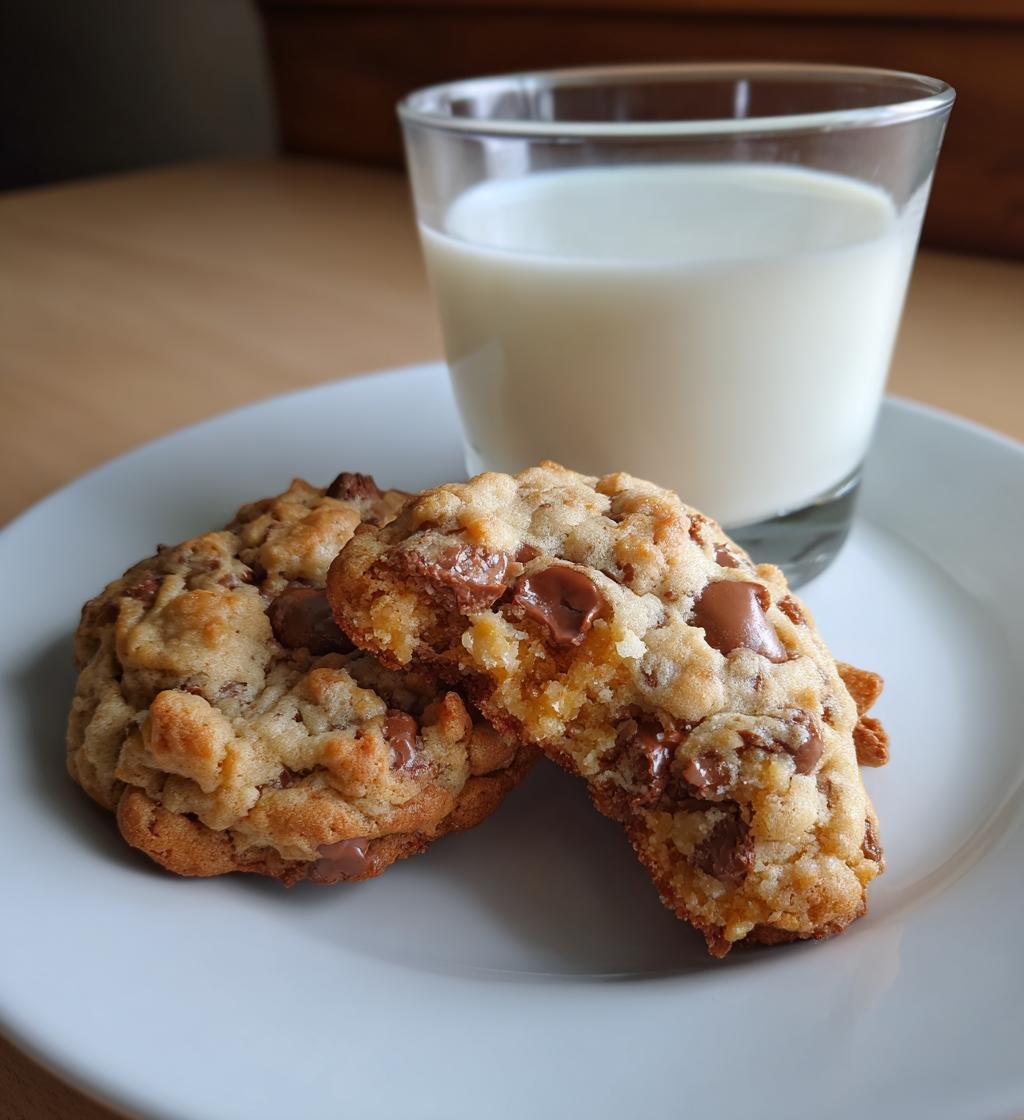
There’s something magical about the aroma of freshly baked milk cookies wafting through the house. Trust me, when you take that first bite, the soft and chewy texture makes every moment spent waiting worthwhile. These cookies, with their gooey chocolate chips and sweet, buttery flavor, remind me of cozy afternoons spent in the kitchen with my family. We’d gather around, excitedly measuring out ingredients and sneaking spoonfuls of dough—who could resist? This recipe for milk cookies is not just about creating a sweet treat; it’s about creating memories. Whether you’re baking with kids or surprising a loved one, these cookies are sure to bring smiles. So, let’s dive into this delicious adventure together and whip up a batch that’ll warm your heart and satisfy your sweet tooth!
Ingredients List
Gathering the right ingredients is the first step to making the best milk cookies ever! Here’s what you’ll need:
- 1 cup unsalted butter, softened
- 1 cup granulated sugar
- 1 cup packed brown sugar
- 2 large eggs
- 2 teaspoons vanilla extract
- 3 cups all-purpose flour
- 1 teaspoon baking soda
- 1 teaspoon salt
- 2 cups chocolate chips
Make sure your butter is softened to room temperature; it really helps in creating that perfect creamy texture when you mix it with the sugars. And don’t skimp on those chocolate chips—more is definitely more in this case! Let’s get baking!
How to Prepare Milk Cookies
Getting those delicious milk cookies from your mixing bowl to your mouth is a delightful journey! Follow these simple steps to ensure your cookies come out perfectly soft and chewy every time.
Step-by-Step Instructions
First things first, let’s get that oven preheating! Set it to 350°F (175°C) so it’s nice and warm when your cookie dough is ready.
In a large mixing bowl, start by creaming together the softened butter, granulated sugar, and packed brown sugar. Use a sturdy wooden spoon or a hand mixer to blend until it’s light and fluffy—this should take about 2-3 minutes. You want it to look like whipped honey, which means you’ve got those air bubbles forming!
Next, crack in those two large eggs and pour in the vanilla extract. Mix everything together until it’s well combined. At this point, you’ll see a beautiful, smooth batter coming together.
In a separate bowl, whisk together the all-purpose flour, baking soda, and salt. This step is crucial to ensure even distribution of the baking soda and salt, which helps your cookies rise just right. Gradually add this dry mixture to your wet ingredients, mixing gently until you see no more flour streaks. Be careful not to overmix; we want to keep that tender texture!
Now, fold in the chocolate chips. I always say, the more chocolate, the better! Using a spatula, gently mix them in until they’re evenly distributed throughout the dough.
Now it’s time to drop your dough! Scoop tablespoon-sized portions onto a baking sheet lined with parchment paper. Leave some space between each scoop because these cookies will spread out a bit while baking. Pop them in the preheated oven and bake for 10-12 minutes, or until the edges are golden brown but the centers still look slightly soft. This is key for that chewy texture!
Once they’re out of the oven, let them cool on the baking sheet for about 5 minutes. Then, transfer them to wire racks to cool completely. And there you have it—your amazing milk cookies are ready to enjoy!
Nutritional Information
When it comes to indulging in milk cookies, it’s nice to know what you’re treating yourself to! Here’s an estimated breakdown of the nutritional information for one delicious cookie:
- Calories: 150
- Fat: 7g
- Saturated Fat: 4g
- Unsaturated Fat: 2g
- Trans Fat: 0g
- Cholesterol: 20mg
- Sodium: 100mg
- Carbohydrates: 20g
- Fiber: 1g
- Sugar: 10g
- Protein: 2g
Keep in mind that these values are approximate and can vary based on specific brands and ingredient choices. But hey, who’s counting when you’re enjoying a warm, gooey cookie? Just savor every bite!
Why You’ll Love This Recipe
Milk cookies are truly a timeless treat, and here’s why you’ll fall head over heels for this recipe:
- Irresistible Flavor: The combination of buttery richness and sweet chocolate chips creates a flavor explosion that keeps everyone coming back for more.
- Soft and Chewy Texture: These cookies boast that perfect soft and chewy bite that melts in your mouth—it’s like a warm hug for your taste buds!
- Quick and Easy: With just a handful of simple ingredients, you can whip up a batch in no time. Perfect for those last-minute cravings or surprise guests!
- Family-Friendly Fun: Baking these cookies is a fantastic way to bond with kids. They’ll love getting their hands dirty and sneaking bites of dough when you’re not looking!
- Versatile Treat: Whether you’re serving them at a birthday party, holiday gathering, or just enjoying a quiet evening at home, these cookies fit every occasion.
- Customization Galore: Feel free to switch up the chocolate chips for nuts, dried fruit, or even different flavored chips. The possibilities are endless!
Trust me, once you try these milk cookies, they’ll become a staple in your baking rotation. Everyone will be asking for your secret recipe!
Tips for Success
Getting those milk cookies just right can be a bit of an art, but don’t worry—I’ve got you covered with my top tips for success!
Don’t Overbake!
This is the golden rule for achieving that soft and chewy texture we all love. Keep a close eye on your cookies as they bake. You want the edges to be golden, but the centers should still look a tad soft. They’ll continue to cook a bit as they cool on the baking sheet, so trust me—pull them out just a smidge early!
Use Room Temperature Ingredients
Make sure your butter and eggs are at room temperature before you start mixing. This helps them blend together more easily, resulting in that fluffy, airy batter. If you forget to take them out ahead of time, no worries! Just pop the eggs in warm water for a few minutes, and let the butter sit on the counter while you prep your other ingredients.
Experiment with Add-Ins
Feel free to get creative! While chocolate chips are a classic, you can swap them out for white chocolate, peanut butter chips, or even dried fruits like cranberries or raisins. Chopped nuts also add a delightful crunch. Just remember to adjust the amounts to keep that perfect cookie balance!
Chill the Dough for Extra Flavor
If you have a little extra time, try chilling your cookie dough for at least 30 minutes before baking. It really enhances the flavors and helps the cookies maintain their shape while baking. Plus, it’s a great way to make dough ahead of time for later baking sessions!
Keep it Fresh
Store your cookies in an airtight container to keep them soft and chewy for days. If you want to freeze some for later, just layer them with parchment paper in a freezer-safe container. They’ll be a sweet surprise when you need a quick treat!
With these tips in your back pocket, you’ll be on your way to baking the perfect batch of milk cookies every time. Happy baking!
Variations
If you’re looking to mix things up with your milk cookies, you’re in for a treat! Here are some fun variations to try that will add a twist to the classic recipe:
- Chocolate Lovers: Swap out the regular chocolate chips for dark chocolate, milk chocolate, or even white chocolate chips for a decadent twist.
- Nutty Goodness: Toss in some chopped walnuts or pecans to add a delightful crunch and an earthy flavor. Just be sure to adjust the amount of chocolate chips accordingly!
- Fruity Surprise: Dried fruits like cranberries, cherries, or raisins can add a chewy texture and a pop of sweetness. They pair wonderfully with the rich buttery flavor of the cookies.
- Peanut Butter Delight: For a nutty spin, mix in some peanut butter chips or even swirl in a bit of creamy peanut butter into the dough for an extra layer of flavor.
- Spice It Up: Add a pinch of cinnamon or nutmeg to the dough to give your cookies a warm, cozy flavor. This is especially nice during the fall and winter months!
- Fun Sprinkles: For a festive touch, add colorful sprinkles to the dough before baking. This is perfect for birthday celebrations or just to brighten up your day!
Feel free to get creative and combine a few of these ideas! Each variation brings its own charm to the iconic milk cookie, ensuring there’s always something new to enjoy. Happy baking!
Storage & Reheating Instructions
Once you’ve baked your delicious milk cookies and indulged in a few (or more!), you’ll want to know how to keep them fresh for later. Storing these cookies properly is key to maintaining their soft and chewy texture.
To store your leftover cookies, simply place them in an airtight container. This helps lock in moisture and keeps them from drying out. If you have a lot of cookies, you can layer them with parchment paper to prevent sticking. They’ll stay fresh on your kitchen counter for about a week—if they last that long!
If you want to keep your cookies for a longer time, consider freezing them. Just make sure they’re completely cool before placing them in a freezer-safe container, again using parchment paper between layers. They can be frozen for up to three months. When you’re ready for a treat, simply pull out however many you want and let them thaw at room temperature for about 15-20 minutes.
Now, if you prefer your cookies warm (who doesn’t?), reheating is a cinch! You can pop them in the microwave for about 10-15 seconds for that fresh-baked feel—just be careful not to overdo it, or they might get a bit tough. Alternatively, you can place them in a preheated oven at 350°F (175°C) for about 5 minutes. This will revive their softness and bring back that delightful aroma!
With these storage and reheating tips, you can enjoy your milk cookies whenever the craving strikes! Happy munching!
FAQ Section
Q1: Can I make these milk cookies without chocolate chips?
Absolutely! While chocolate chips are a classic addition, you can definitely get creative. Try adding nuts, dried fruit, or even butterscotch chips for a different flavor profile. The beauty of milk cookies is that they’re versatile!
Q2: How do I know when my milk cookies are done baking?
Great question! You want to look for golden edges while the centers still look slightly soft. Remember, they’ll continue to firm up as they cool on the baking sheet, so it’s better to take them out a bit early than overbake!
Q3: Can I freeze the cookie dough for later use?
Yes, you can! Just scoop the dough into tablespoon-sized portions, place them on a baking sheet to freeze until firm, and then transfer them to an airtight container or freezer bag. You can bake them straight from the freezer; just add a minute or two to the baking time!
Q4: What’s the best way to store leftover milk cookies?
To keep your cookies soft and chewy, store them in an airtight container at room temperature. They’ll stay fresh for about a week. If you want to keep them longer, you can freeze them as well—just remember to use parchment paper between layers to prevent sticking!
Q5: Can I use whole wheat flour instead of all-purpose flour?
You can, but it might change the texture a bit. Whole wheat flour will give your milk cookies a denser, nuttier flavor. If you decide to try it, I recommend using half whole wheat and half all-purpose flour for the best results!

Milk Cookies That Melt Hearts: 7 Reasons to Bake Now
- Total Time: 27 minutes
- Yield: 24 cookies 1x
- Diet: Vegetarian
Description
Delicious homemade milk cookies that are soft and chewy.
Ingredients
- 1 cup unsalted butter, softened
- 1 cup granulated sugar
- 1 cup brown sugar, packed
- 2 large eggs
- 2 teaspoons vanilla extract
- 3 cups all-purpose flour
- 1 teaspoon baking soda
- 1 teaspoon salt
- 2 cups chocolate chips
Instructions
- Preheat your oven to 350°F (175°C).
- In a large bowl, cream the butter, granulated sugar, and brown sugar together.
- Add in the eggs and vanilla extract, mixing until well combined.
- In another bowl, whisk together the flour, baking soda, and salt.
- Gradually add the dry ingredients to the wet ingredients, mixing until just combined.
- Fold in the chocolate chips.
- Drop tablespoon-sized dough onto a baking sheet lined with parchment paper.
- Bake for 10-12 minutes or until the edges are golden.
- Allow to cool on the baking sheet for a few minutes before transferring to wire racks.
Notes
- Store cookies in an airtight container.
- For softer cookies, do not overbake.
- You can add nuts or substitute chocolate chips with dried fruit.
- Prep Time: 15 minutes
- Cook Time: 12 minutes
- Category: Dessert
- Method: Baking
- Cuisine: American
Nutrition
- Serving Size: 1 cookie
- Calories: 150
- Sugar: 10g
- Sodium: 100mg
- Fat: 7g
- Saturated Fat: 4g
- Unsaturated Fat: 2g
- Trans Fat: 0g
- Carbohydrates: 20g
- Fiber: 1g
- Protein: 2g
- Cholesterol: 20mg
Keywords: milk cookies, chocolate chip cookies, homemade cookies