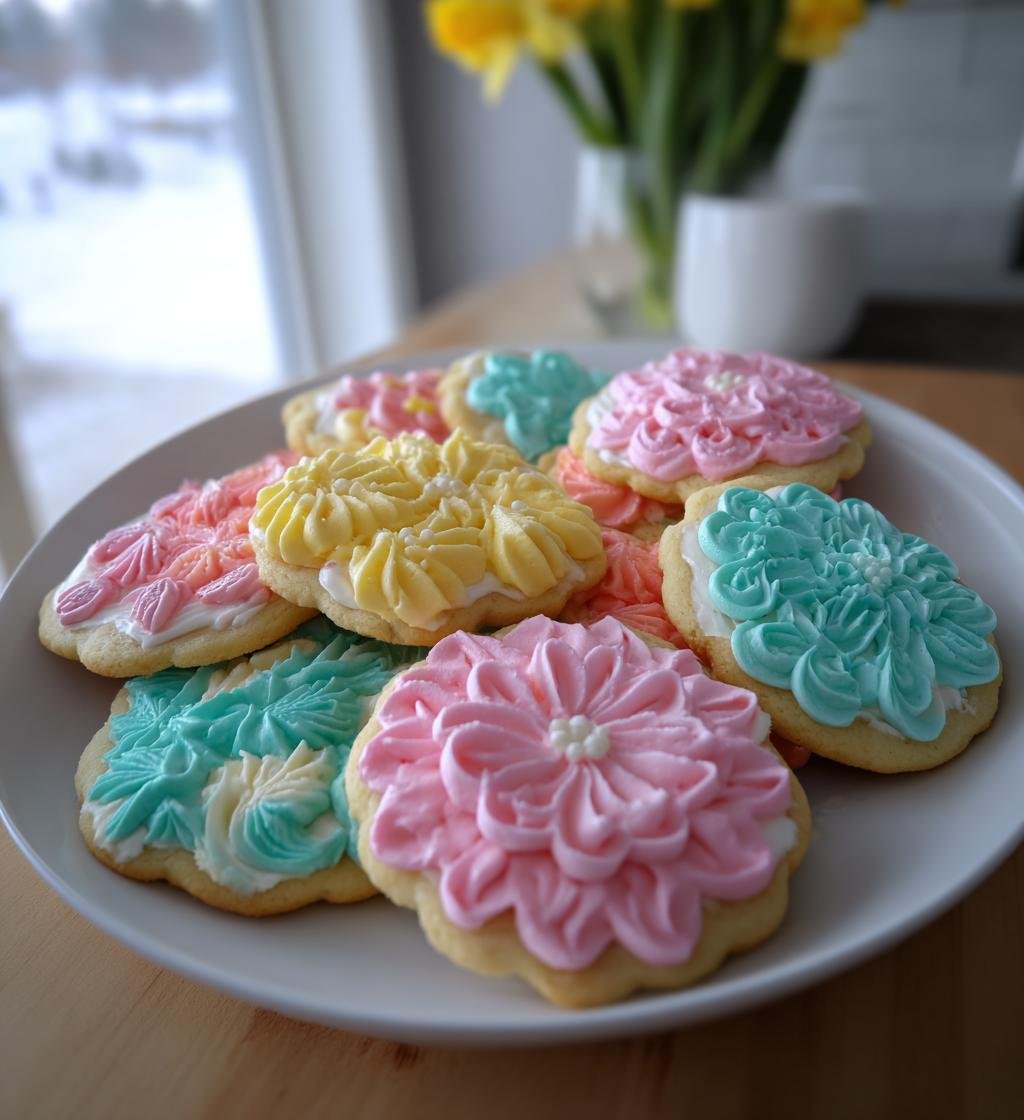
Spring is here, and with it comes the joy of baking! There’s just something magical about whipping up a batch of spring cookies decorated with buttercream that makes my heart sing. I remember the days spent in the kitchen with my mom, flour dusting our noses as we giggled and crafted colorful cookies for our annual spring picnic. Each cookie was a canvas waiting for bright icing and sprinkles, and oh, the excitement when we finally revealed our creations! These cookies are perfect for any spring celebration, from Easter gatherings to simply welcoming the season with friends. Trust me, the vibrant colors of the buttercream and the sweet aroma wafting through the house will bring smiles all around. So, let’s dive into this delightful recipe and make some sweet memories together!
Spring is here, and with it comes the joy of baking! There’s just something magical about whipping up a batch of spring cookies decorated with buttercream that makes my heart sing. I remember the days spent in the kitchen with my mom, flour dusting our noses as we giggled and crafted colorful cookies for our annual spring picnic. Each cookie was a canvas waiting for bright icing and sprinkles, and oh, the excitement when we finally revealed our creations! These cookies are perfect for any spring celebration, from Easter gatherings to simply welcoming the season with friends. Trust me, the vibrant colors of the buttercream and the sweet aroma wafting through the house will bring smiles all around. So, let’s dive into this delightful recipe and make some sweet memories together!
Ingredients List
Gathering the right ingredients is the first step to creating these delightful spring cookies decorated with buttercream. Here’s what you’ll need:
- 2 cups all-purpose flour: This will be the base of your cookies, providing that classic texture we all love.
- 1/2 cup unsalted butter, softened: Make sure it’s at room temperature for easy creaming with the sugar.
- 1 cup granulated sugar: This will sweeten your cookies and help achieve that lovely crisp edge.
- 1 large egg: A binder that adds moisture and richness to the dough.
- 1 teaspoon vanilla extract: For that warm, comforting flavor that pairs beautifully with the sweetness.
- 1/2 teaspoon baking powder: This will give your cookies a little lift, ensuring they’re not too dense.
- 1/4 teaspoon salt: Don’t skip this! It enhances all the other flavors and balances the sweetness.
- 2 cups buttercream icing: The star of our show; you’ll want it to be fluffy and easy to pipe.
- Food coloring (various colors): Use your favorite shades to bring your spring cookies to life!
Once you have everything ready, you’re all set to create some magical cookies that will brighten up any gathering!
How to Prepare Spring Cookies Decorated Buttercream
Now that you’ve gathered your ingredients, it’s time to roll up your sleeves and get baking! Follow these simple steps to whip up your delicious spring cookies decorated with buttercream.
Step 1: Preheat the Oven
First things first, we need to get that oven nice and toasty! Preheat it to 350°F (175°C). Preheating is essential because it ensures your cookies bake evenly and rise beautifully. Trust me, you don’t want to skip this step!
Step 2: Cream the Butter and Sugar
In a large mixing bowl, cream together the softened butter and granulated sugar until it’s light and fluffy. You’ll want to beat it for about 2-3 minutes using a hand mixer or stand mixer. The mixture should turn pale and airy—this is the secret to a tender cookie!
Step 3: Add Egg and Vanilla
Next, crack in that large egg and pour in the vanilla extract. Mix everything together thoroughly until well combined. This step adds richness and that comforting vanilla flavor we all adore.
Step 4: Prepare Dry Ingredients
In another bowl, whisk together the all-purpose flour, baking powder, and salt. This is a crucial step to ensure your dry ingredients are evenly distributed, which helps the cookies rise and taste just right.
Step 5: Combine Mixtures
Now comes the fun part! Gradually add the dry ingredients to your wet mixture, stirring gently until just combined. Be careful not to overmix; a few flour streaks are okay! You want the dough to come together without becoming tough.
Step 6: Shape the Cookies
Time to roll out the dough! Lightly flour your work surface and roll out the dough to about 1/4 inch thick. Use your favorite cookie cutters to cut out spring shapes. I love using bunnies, flowers, and butterflies for that festive touch!
Step 7: Bake the Cookies
Place the shaped cookies on a baking sheet lined with parchment paper. Bake them in your preheated oven for 8-10 minutes, or until the edges are just starting to turn golden. Keep an eye on them; they’ll be done when they’re set but still soft in the center!
Step 8: Cool Before Decorating
Let those delicious cookies cool completely on a wire rack before you even think about decorating. It’s super important because warm cookies can cause the buttercream to melt, and we don’t want that!
Step 9: Prepare Buttercream Icing
While the cookies cool, it’s time to prepare the buttercream icing! If you haven’t already, whip it up until it’s light and fluffy. Then, divide it into bowls and use food coloring to tint your icing with vibrant spring colors. The more, the merrier!
Step 10: Decorate the Cookies
Finally, take those cooled cookies and pipe or spread the beautifully colored buttercream icing on top. Get creative! You can use different piping tips for fun designs or simply spread it on with a knife. Add sprinkles for extra pizzazz! Enjoy the process and let your personality shine through!
Tips for Success
To make sure your spring cookies decorated with buttercream turn out perfectly every time, I’ve got some handy tips that’ll help you along the way!
- Use Seasonal Cookie Cutters: Embrace the spirit of spring by using fun shapes like flowers, bunnies, and eggs. It adds a festive touch that everyone will love!
- Chill the Dough: If your dough feels too soft or sticky, don’t hesitate to chill it in the fridge for about 30 minutes. This helps the cookies hold their shape while baking.
- Keep an Eye on Baking Time: Every oven is different, so start checking your cookies a minute or two early. You want them set but still soft—they’ll firm up as they cool!
- Experiment with Colors: Don’t be afraid to mix and match your food coloring! Layering different colors can create beautiful, eye-catching designs that really pop.
- Use a Piping Bag: For those intricate designs, a piping bag makes decorating a breeze. You can also use a zip-top bag with the corner snipped off if you don’t have one!
- Practice Makes Perfect: If you’re new to decorating, practice on a few cookies first. It’s all about having fun and finding your style, so don’t stress!
With these tips, you’ll be well on your way to creating a batch of beautiful, delicious spring cookies that’ll impress everyone!
Nutritional Information
Let’s talk about the deliciousness and nutrition of these spring cookies decorated with buttercream! Each cookie is a sweet treat, and here’s an estimate of the nutritional values per serving (1 cookie):
- Calories: 150
- Fat: 7g
- Saturated Fat: 4g
- Unsaturated Fat: 2g
- Trans Fat: 0g
- Cholesterol: 20mg
- Sodium: 50mg
- Carbohydrates: 20g
- Fiber: 0g
- Protein: 1g
- Sugar: 10g
These values may vary slightly depending on the specific ingredients you use, but this gives you a good idea of what to expect. Enjoy each delightful bite, and remember, a little indulgence is perfectly okay!
FAQ Section
Can I use different flavors of buttercream?
Absolutely! One of the best parts about decorating spring cookies with buttercream is how versatile it can be. You can easily add different flavors to your buttercream by mixing in extracts like almond, lemon, or even mint. Just start with a teaspoon and taste as you go. You can also fold in cocoa powder for chocolate buttercream or pureed fruit for a fresh twist. The possibilities are endless, so feel free to get creative!
How do I store leftover cookies?
Storing your leftover spring cookies decorated with buttercream is super simple! Just make sure they’re completely cool before you do anything else. Place them in an airtight container at room temperature, separating layers with parchment paper to prevent sticking. They’ll stay fresh for about a week. If you live in a particularly warm area, you might want to refrigerate them to keep that buttercream nice and firm!
Can I freeze these cookies?
You sure can! Freezing spring cookies is a great way to save them for later. Just make sure they’re fully decorated and cooled. Place them in a single layer on a baking sheet and freeze until solid, then transfer them to an airtight container or zip-top bag. They’ll keep well in the freezer for up to three months. When you’re ready to enjoy them, simply let them thaw at room temperature for a few hours. It’s like having a little taste of spring, even in the middle of winter!
Why You’ll Love This Recipe
- Quick Preparation: With just 20 minutes of prep time, you can whip up a delightful batch of cookies that are perfect for any spring occasion!
- Easy to Decorate: The buttercream icing is simple to work with, allowing you to unleash your creativity without any stress. Whether you want to pipe intricate designs or do a quick spread, it’s all easy!
- Seasonal Appeal: These spring cookies are a celebration of the season! With their vibrant colors and fun shapes, they add a festive touch to any gathering.
- Perfect for Family Fun: Baking and decorating these cookies can turn into a fun family activity. Kids love getting involved, and it’s a great way to create lasting memories together.
- Deliciously Customizable: You can easily change up the flavors of the buttercream or the shapes of the cookies to suit your tastes or the occasion. The flexibility is endless!
- Great for Gifting: Pack these colorful cookies in cute boxes or bags, and you’ve got the perfect homemade gift for friends, neighbors, or anyone who could use a little sweetness in their life!
Serving Suggestions
These delightful spring cookies decorated with buttercream are perfect for a variety of occasions! Here are some of my favorite ways to serve them:
- Spring Celebrations: Whether it’s Easter brunch, a baby shower, or a garden party, these cookies add a festive touch to any spring gathering.
- Picnics and Outdoor Events: Pack them up for a picnic in the park! The colorful decorations will brighten up your outdoor feast and are sure to impress your friends.
- Birthday Parties: These cookies make fantastic party favors or dessert table additions. Kids and adults alike will love the fun shapes and vibrant colors!
- Tea Time: Serve these cookies alongside a nice cup of tea for a delightful afternoon treat. Their sweetness pairs beautifully with both black and herbal teas.
- Creative Workshops: Host a cookie decorating party with friends or family! Set up a decorating station with various colors of buttercream and toppings, and let everyone unleash their creativity.
No matter the occasion, these spring cookies will surely bring smiles and sweet moments to your table!
Print
Spring Cookies Decorated Buttercream: 10 Sweet Memories Await
- Total Time: 30 minutes
- Yield: 24 cookies 1x
- Diet: Vegetarian
Description
Delicious spring cookies decorated with buttercream icing.
Ingredients
- 2 cups all-purpose flour
- 1/2 cup unsalted butter, softened
- 1 cup granulated sugar
- 1 large egg
- 1 teaspoon vanilla extract
- 1/2 teaspoon baking powder
- 1/4 teaspoon salt
- 2 cups buttercream icing
- Food coloring (various colors)
Instructions
- Preheat your oven to 350°F (175°C).
- In a bowl, cream together the butter and sugar until light and fluffy.
- Add the egg and vanilla, mixing well.
- In another bowl, whisk together the flour, baking powder, and salt.
- Gradually add the dry ingredients to the wet mixture, stirring until combined.
- Roll out the dough and cut into desired shapes.
- Place cookies on a baking sheet and bake for 8-10 minutes.
- Let cookies cool completely before decorating.
- Use food coloring to tint the buttercream icing.
- Decorate the cooled cookies with the colored buttercream.
Notes
- Store cookies in an airtight container.
- Use seasonal cookie cutters for a festive touch.
- Experiment with different colors for decoration.
- Prep Time: 20 minutes
- Cook Time: 10 minutes
- Category: Dessert
- Method: Baking
- Cuisine: American
Nutrition
- Serving Size: 1 cookie
- Calories: 150
- Sugar: 10g
- Sodium: 50mg
- Fat: 7g
- Saturated Fat: 4g
- Unsaturated Fat: 2g
- Trans Fat: 0g
- Carbohydrates: 20g
- Fiber: 0g
- Protein: 1g
- Cholesterol: 20mg
Keywords: spring cookies, buttercream, decorated cookies, festive cookies