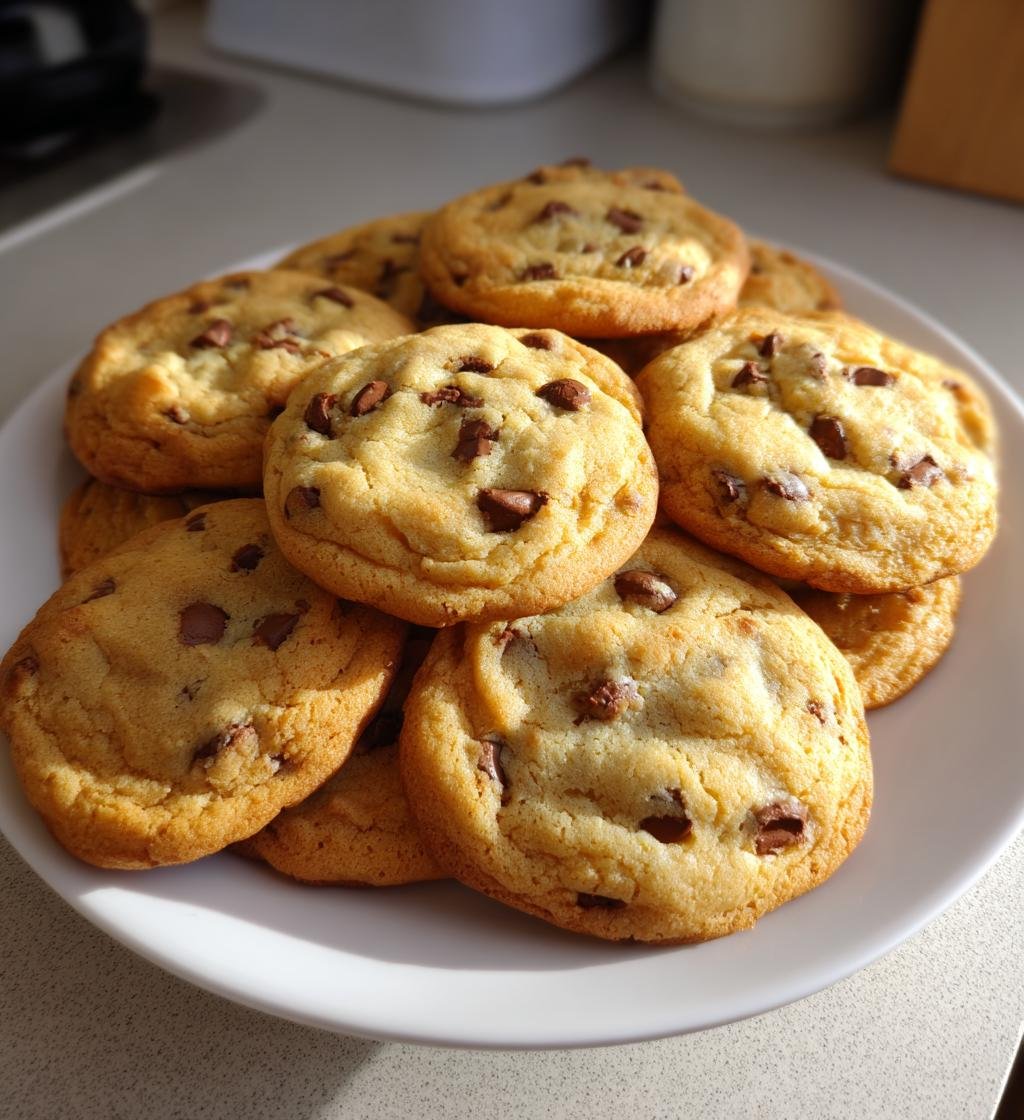
There’s something truly magical about making *Easter sweets* that brings everyone together! As the days get longer and flowers start to bloom, the excitement of preparing treats for Easter fills the air. I love gathering my family in the kitchen, where laughter and delicious scents swirl around us. This recipe for chocolate chip cookies is not only simple but also a crowd-pleaser, perfect for sharing with loved ones during the holiday.
Growing up, Easter meant more than just egg hunts and fancy dresses. It was a time for baking with my mom, who always had a twinkle in her eye as she whipped up sweet confections. The kitchen would be filled with the comforting aroma of melting chocolate and warm cookies, bringing us all together as we eagerly awaited the first batch to come out of the oven. Each bite of these cookies is like a little piece of nostalgia, evoking memories of family gatherings and joyful celebrations.
So, roll up your sleeves and get ready to create some delightful *Easter sweets*! Trust me, these cookies are as fun to make as they are to eat, and they’ll surely become a cherished part of your holiday traditions, just like they are in mine!
Ingredients List
Here’s what you’ll need to whip up these delightful *Easter sweets*. Make sure to gather the freshest ingredients for the best results!
- 1 cup sugar
- 1/2 cup unsalted butter, softened
- 2 cups all-purpose flour
- 2 large eggs
- 1 teaspoon pure vanilla extract
- 1/2 teaspoon baking powder
- 1/4 teaspoon salt
- 1 cup chocolate chips (feel free to mix it up with dark or white chocolate if you like!)
These ingredients come together to create a cookie that’s not only delicious but also perfect for sharing with family and friends during the Easter celebrations. Let’s get baking!
How to Prepare Easter Sweets
Alright, let’s dive into the fun part: making these scrumptious *Easter sweets*! Follow these steps, and you’ll have delicious cookies ready to share in no time!
Preheating the Oven
First things first, you’ll want to preheat your oven to 350°F (175°C). This step is super important because it ensures your cookies bake evenly and come out perfectly golden. Trust me, a properly preheated oven makes all the difference!
Creaming Sugar and Butter
Next, grab a mixing bowl and cream together that sugar and softened butter. Using a wooden spoon or a hand mixer, blend them until the mixture is light and fluffy. You’re aiming for a texture that’s airy—this will help your cookies rise beautifully. It should feel almost like whipped cream; you’ll know it’s ready when it looks pale and fluffy!
Incorporating Eggs and Vanilla
Now it’s time to add in those eggs and the pure vanilla extract! Crack the eggs directly into the bowl and mix well until everything is nicely combined. The vanilla adds that lovely aroma and flavor that makes these cookies feel extra special, so don’t skimp on it!
Mixing Dry Ingredients
In a separate bowl, whisk together the flour, baking powder, and salt. This is a crucial step because it ensures the baking powder is evenly distributed throughout the flour. You don’t want any surprises when it comes to rising! Just give it a good stir until everything is well mixed.
Combining Wet and Dry Mixtures
Now, let’s bring it all together! Gradually add the dry ingredients into the wet mixture. I like to do this in three parts, mixing gently after each addition. This helps to avoid overmixing, which can make your cookies tough. Just stir until you see no more flour—leave a few streaks if you can!
Adding Chocolate Chips
Here comes the best part—folding in those chocolate chips! Gently add them to your dough, making sure they’re evenly distributed. I love to give the dough a little toss rather than a stir; this way, the chips stay intact and you get those delightful pockets of chocolate in every bite!
Baking the Cookies
Finally, it’s time to bake! Drop spoonfuls of dough onto a baking sheet lined with parchment paper, leaving a little space between each one. Pop them in the preheated oven and bake for about 10-12 minutes or until they’re golden brown around the edges. The smell of baking cookies will fill your kitchen, and trust me, it’s heavenly!
Tips for Success
Now that you’re all set to bake these delightful *Easter sweets*, here are some pro tips to ensure your cookies turn out perfectly every single time!
Don’t Overmix the Dough
One of the biggest secrets to soft, chewy cookies is to avoid overmixing the dough. Once you add the dry ingredients, mix just until you see no more flour. A few lumps are totally fine! Overmixing can lead to tough cookies, and nobody wants that. Keep it gentle, and your cookies will thank you!
Check for Doneness
When it comes to knowing when your cookies are done, you want to keep an eye on those edges. They should be set and gently golden brown while the centers will look a tad soft. Remember, the cookies continue to bake a little after you take them out of the oven, so don’t wait until they’re hard! Trust your instincts, and when in doubt, pull them a bit early!
Use Quality Chocolate Chips
Since chocolate chips are a star ingredient in these cookies, using high-quality chocolate can make all the difference. Whether you go for milk, dark, or white chocolate, pick a brand you love. You’ll be surprised at how much better your cookies taste when you use chocolate you enjoy!
Cool on the Baking Sheet
After baking, let your cookies cool on the baking sheet for a few minutes before transferring them to a wire rack. This allows them to set properly, so they won’t crumble when you move them. Plus, you’ll get that perfect balance of warm, gooey goodness while they cool!
Experiment with Mix-Ins
Feel free to get creative with your cookies! You can add nuts, dried fruits, or even a sprinkle of sea salt on top before baking. Each little tweak can add a new flavor dimension and make your *Easter sweets* even more special. Don’t be afraid to try something new!
Storage & Reheating Instructions
Once you’ve baked up a batch of these delightful *Easter sweets*, you’ll want to make sure they stay fresh and tasty! Here’s how to properly store any leftover cookies and how to bring them back to life if needed.
To store your cookies, let them cool completely on a wire rack. Once they’re cool, place them in an airtight container. This is super important, as it keeps them soft and prevents them from getting stale. You can layer them with parchment paper between to avoid sticking, especially if you’ve added chocolate chips or other goodies! They’ll stay fresh at room temperature for about a week—if they last that long!
If you want to store them for longer, you can freeze the cookies! Just place them in a freezer-safe bag or container, and they’ll keep for up to three months. When you’re ready to enjoy them again, simply take out the desired amount and let them thaw at room temperature for a few minutes. You can also pop them in the microwave for about 10-15 seconds to warm them up and get that melty chocolate goodness back!
Trust me, there’s nothing quite like the smell of freshly baked cookies warming up in your kitchen again! So go ahead, store those *Easter sweets* properly, and enjoy them whenever the craving hits!
Nutritional Information
When you’re indulging in these delightful *Easter sweets*, you might be curious about what’s in them! Here’s a breakdown of the typical nutritional values per cookie, so you can enjoy them guilt-free (or at least a little less guilty!). Keep in mind that these values may vary based on the specific ingredients you choose.
- Serving Size: 1 cookie
- Calories: 150
- Total Fat: 7g
- Saturated Fat: 4g
- Unsaturated Fat: 2g
- Trans Fat: 0g
- Cholesterol: 25mg
- Sodium: 50mg
- Total Carbohydrates: 20g
- Dietary Fiber: 1g
- Sugars: 10g
- Protein: 2g
So there you have it! These cookies are a delightful treat that can fit into your holiday celebrations. Just remember to savor each bite and share the joy with your loved ones!
FAQ Section
Got questions about these scrumptious *Easter sweets*? Don’t worry, I’ve got you covered! Here are some common queries that pop up, along with my favorite tips and tricks to make these cookies even better.
Can I use different types of chocolate chips?
Absolutely! This is one of the best parts about making these cookies—you can really customize them to your taste. Whether you prefer milk chocolate, dark chocolate, or even white chocolate, feel free to mix it up! Each type brings its own unique flavor, so you can create a delicious twist that suits your cravings. You could even do a combo—just imagine the melty goodness of both dark and milk chocolate in a single cookie!
How can I make these cookies healthier?
If you want to lighten up these cookies a bit, I have a few easy swaps you can try! First, you can reduce the sugar by about a quarter without losing too much sweetness. Another option is to use whole grain flour instead of all-purpose flour. This adds a nice nutty flavor and extra fiber! You might also consider substituting some of the butter with unsweetened applesauce. It keeps the cookies moist while cutting down on fat. Trust me, they’ll still turn out delicious!
What are some variations I can try?
The possibilities are endless when it comes to variations for these *Easter sweets*! You could add a handful of chopped nuts for some crunch—walnuts or pecans work wonderfully. Or, if you’re feeling adventurous, toss in some dried fruits like cranberries or apricots for a chewy surprise. Spices like cinnamon or a pinch of sea salt sprinkled on top before baking can add a delightful twist, too! Don’t hesitate to get creative and make these cookies your own!
Why You’ll Love This Recipe
This recipe for *Easter sweets* is truly a joy, and here’s why you’ll want to make it a part of your holiday tradition!
- Quick Preparation: With just 15 minutes of prep time, you can have these delightful cookies baking in no time. It’s perfect for those busy Easter mornings!
- Delicious Flavor: The combination of chocolate chips and the buttery cookie base creates an irresistible flavor that will have everyone coming back for seconds (or thirds!).
- Festive Nature: These cookies are not only tasty but also add a festive touch to your Easter celebrations. Their warm, golden-brown hue and chocolatey goodness make them a treat everyone will adore.
- Customizable: Feel free to mix in your favorite ingredients! Whether it’s nuts, dried fruits, or different types of chocolate, you can easily tailor these cookies to suit your family’s taste.
- Perfect for Sharing: With a yield of 24 cookies, there’s plenty to share with family and friends. They’re great for egg hunts, family gatherings, or just as a sweet surprise for your loved ones!
So gather your ingredients and get ready to bake up some joy this Easter! Trust me, these cookies will become a beloved part of your holiday celebrations.
Print
Easter Sweets: 7 Magical Cookie Recipes to Cherish
- Total Time: 27 minutes
- Yield: 24 cookies 1x
- Diet: Vegetarian
Description
Delicious treats to celebrate Easter.
Ingredients
- 1 cup sugar
- 1/2 cup butter
- 2 cups all-purpose flour
- 2 eggs
- 1 teaspoon vanilla extract
- 1/2 teaspoon baking powder
- 1/4 teaspoon salt
- 1 cup chocolate chips
Instructions
- Preheat your oven to 350°F (175°C).
- In a bowl, cream together sugar and butter.
- Add eggs and vanilla extract, mixing well.
- In another bowl, combine flour, baking powder, and salt.
- Gradually add dry ingredients to the wet mixture.
- Fold in chocolate chips.
- Drop spoonfuls of dough onto a baking sheet.
- Bake for 10-12 minutes or until golden brown.
Notes
- Store in an airtight container.
- Best served fresh.
- You can use different types of chocolate chips.
- Prep Time: 15 minutes
- Cook Time: 12 minutes
- Category: Dessert
- Method: Baking
- Cuisine: American
Nutrition
- Serving Size: 1 cookie
- Calories: 150
- Sugar: 10g
- Sodium: 50mg
- Fat: 7g
- Saturated Fat: 4g
- Unsaturated Fat: 2g
- Trans Fat: 0g
- Carbohydrates: 20g
- Fiber: 1g
- Protein: 2g
- Cholesterol: 25mg
Keywords: Easter sweets, desserts, cookies