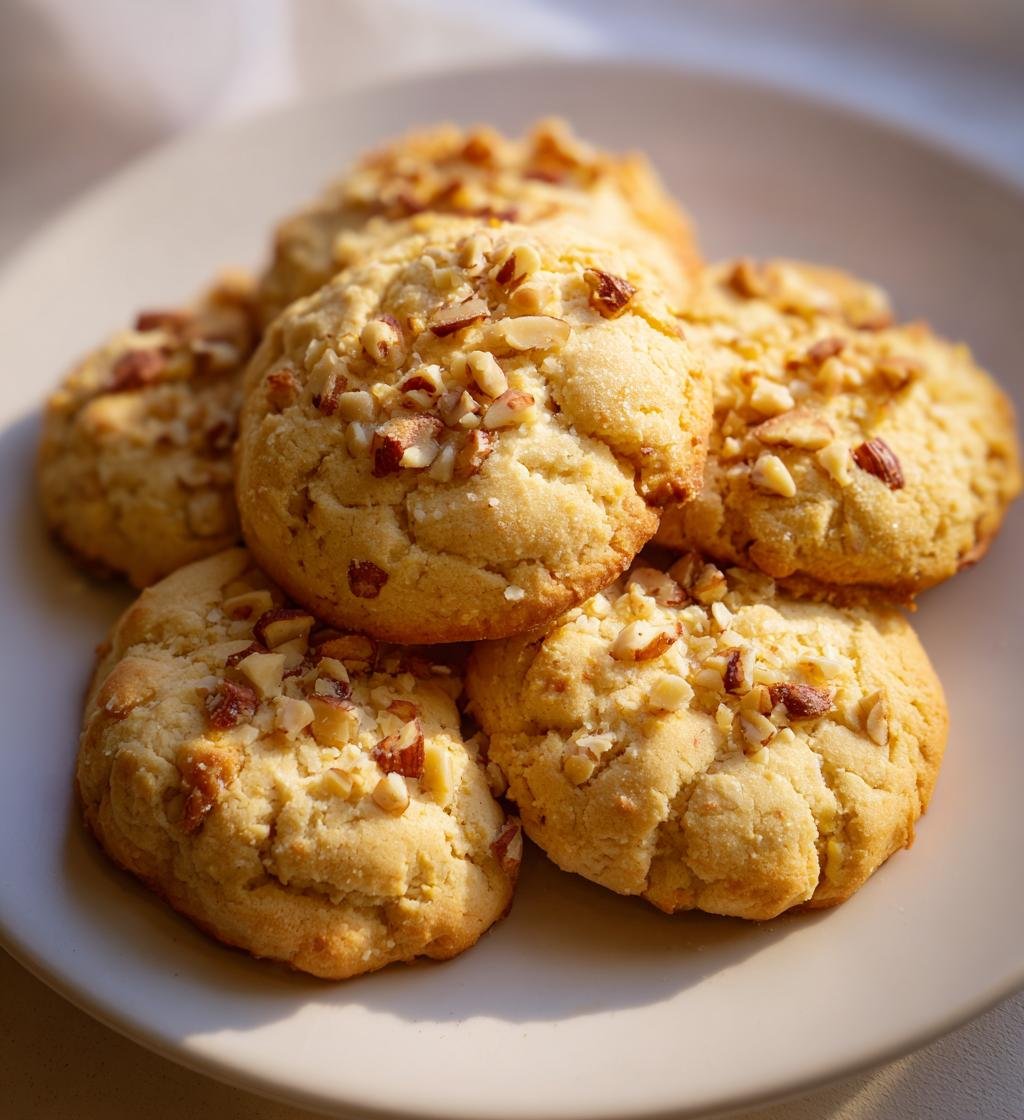
Ah, spring! The season when everything blooms and the air is filled with the sweet scent of new beginnings. It’s the perfect time to whip up a batch of *spring cookies* that capture the freshness and joy of this lovely time of year. These cookies are light, refreshing, and so simple to make – they practically invite you to gather your friends and family for a sunshine-filled afternoon. I remember making these cookies with my kids every spring, our kitchen buzzing with laughter as we mixed the dough and snuck bites of the sugary goodness. What I love most about this recipe is its versatility; you can easily customize it with your favorite nuts or dried fruits, making each batch a delightful surprise. Trust me, once you take a bite of these lovely *spring cookies*, you’ll be transported to a sun-drenched garden, no matter where you are! Let’s dive into making these delightful treats together!
Ingredients List
Here’s everything you’ll need to create these delightful *spring cookies*. I promise, it’s a simple lineup that you might already have in your pantry!
- 2 cups all-purpose flour: This forms the base of our cookies, giving them structure and a light texture.
- 1 cup sugar: For that perfect sweetness that balances the flavors and adds a lovely crispiness to the edges.
- 1/2 cup butter, softened: Real butter is key here! It adds richness and contributes to that melt-in-your-mouth experience.
- 1 large egg: This helps bind everything together and adds moisture to our cookies.
- 1 teaspoon vanilla extract: A splash of vanilla brings warmth and depth to the flavor profile.
- 1 teaspoon baking powder: This little helper gives our cookies that lovely lift, making them wonderfully soft.
- 1/2 teaspoon salt: Just a pinch to enhance all the sweet flavors – it really makes a difference!
- 1/2 cup chopped nuts (optional): I love adding walnuts or pecans for a delightful crunch, but feel free to skip if you prefer!
- 1/2 cup dried fruit (optional): Think raisins, cranberries, or even dried apricots! They add a touch of chewiness and a burst of fruity flavor.
Gather these ingredients, and let’s get ready to bake up some magic!
How to Prepare *Spring Cookies*
Alright, let’s roll up our sleeves and get down to the fun part—baking these delightful *spring cookies*! I promise it’s a straightforward process that even the tiniest chefs can help with. Grab your mixing bowls and let’s get started!
Step-by-Step Instructions
First things first, preheat your oven to 350°F (175°C). This step is super important because you want those cookies to bake perfectly! While the oven is warming up, let’s dive into mixing our ingredients.
In a large bowl, cream together the softened butter and sugar until it’s light and fluffy. I like to use a hand mixer for this, but a sturdy wooden spoon works just fine too. You’ll want to beat it for about 2-3 minutes until it’s looking like whipped sunshine.
Next, add in the egg and vanilla extract, mixing until everything is well incorporated. This combination not only adds moisture but also a lovely aroma that fills your kitchen. Now, in another bowl, whisk together the flour, baking powder, and salt. This step ensures that the baking powder gets evenly distributed, which is crucial for those lovely, fluffy cookies!
Gradually add the dry mixture to the wet one, stirring gently. Don’t overmix—just combine until you see no dry flour. If you’re using nuts or dried fruit, now’s the time to fold them in for that extra crunch or chewiness. Trust me, it makes a big difference!
Once your dough is ready, drop spoonfuls onto a baking sheet lined with parchment paper, spacing them a couple of inches apart. Bake in your preheated oven for 10-12 minutes, or until they’re lightly golden around the edges. You might want to set a timer, so you don’t lose track of time while dreaming about how delicious they’ll be!
Once they’re out of the oven, let them cool on a wire rack. This part is tough, but you don’t want to burn your tongue on a hot cookie! And there you have it—perfectly baked *spring cookies* that are ready to be enjoyed!
Nutritional Information
So, let’s chat about the nutrition of these fabulous *spring cookies*! Each cookie is a delightful treat, and while they’re not a health food, they can definitely fit into a balanced diet. Here’s a quick look at the estimated nutritional values per cookie:
- Calories: 150
- Fat: 7g
- Protein: 2g
- Carbohydrates: 20g
- Sugar: 8g
- Sodium: 50mg
- Fiber: 1g
- Cholesterol: 25mg
Remember, these values are estimates and can vary based on specific ingredients and portion sizes. Enjoy these cookies with a sprinkle of love, and savor every bite!
Why You’ll Love This Recipe
- Quick Preparation: You can whip up these *spring cookies* in just about 15 minutes of prep time, making them perfect for unexpected guests or a last-minute treat!
- Light and Refreshing Flavor: The combination of vanilla and optional fruity add-ins creates a delightful taste that captures the essence of spring.
- Perfect for Gatherings: These cookies are ideal for picnics, brunches, or any springtime celebration. They’re sure to brighten up any dessert table!
- Customizable: With options for nuts and dried fruits, you can easily tailor the cookies to your taste or whatever you have on hand.
Tips for Success
To ensure your *spring cookies* turn out perfectly every time, I’ve got some handy tips for you! First off, make sure your butter is truly softened—think room temperature, where it can easily be pressed with a finger. If you forget to take it out in advance, just pop it in the microwave for a few seconds, but be careful not to melt it!
If you’re looking to switch things up, try using brown sugar instead of white for a richer flavor. You can also substitute half of the all-purpose flour with whole wheat flour for a nuttier taste and added fiber. And don’t shy away from experimenting with different nuts or dried fruits; walnuts and dried cherries make a fantastic combination!
Another pro tip? Keep an eye on your cookies as they bake! Ovens can vary, so check them a minute or two earlier than the suggested time. You want them golden but not overdone. Trust me, your taste buds will thank you!
Variations
Now, let’s talk about how to shake things up with these delightful *spring cookies*! One of the best parts of this recipe is its versatility. You can easily swap in different nuts or dried fruits to create a flavor explosion that suits your taste. For instance, try using slivered almonds or macadamia nuts instead of the usual walnuts for a buttery twist. Or, if you’re feeling adventurous, toss in some dark chocolate chips along with your dried fruit for a sweet surprise!
You can also experiment with spices to give your cookies a unique flair. A sprinkle of cinnamon or a hint of cardamom can elevate the flavor profile, making them even more aromatic. Want a tropical vibe? Add some shredded coconut and dried pineapple for a hint of the islands! Each variation adds its own special touch, transforming these *spring cookies* into a delightful seasonal treat every time you bake. Enjoy the creativity!
Storage & Reheating Instructions
To keep your *spring cookies* fresh and delicious, store them in an airtight container at room temperature. They’ll stay tasty for about a week, but I bet they won’t last that long! If you want to enjoy them even longer, you can freeze them. Just layer the cookies between parchment paper in a freezer-safe container, and they’ll keep for up to three months. When you’re ready to indulge, simply let them thaw at room temperature or warm them in the microwave for a few seconds. Trust me, that soft, gooey goodness is worth the wait!
FAQ Section
Q1: Can I use whole wheat flour instead of all-purpose flour?
Absolutely! Using whole wheat flour can add a lovely nuttiness and a bit more fiber to your *spring cookies*. Just keep in mind that the texture might be slightly denser, so you may want to adjust the liquid ingredients if necessary.
Q2: How can I make these cookies gluten-free?
You can easily make these cookies gluten-free by substituting all-purpose flour with a gluten-free flour blend. Look for one that contains xanthan gum for the best results. They’ll still come out delicious!
Q3: What’s the best way to store leftover cookies?
To keep your *spring cookies* fresh, store them in an airtight container at room temperature. They’ll stay tasty for about a week. For longer storage, consider freezing them!
Q4: Can I add chocolate chips to this recipe?
Of course! Adding chocolate chips can give your *spring cookies* a delightful sweetness. Just fold them in with the nuts and dried fruit for a yummy twist!
Q5: What’s the secret to making these cookies soft and chewy?
The key to soft and chewy *spring cookies* is not overbaking them. Keep an eye on them and take them out as soon as the edges are golden. They’ll continue to firm up while cooling on the rack!

spring cookies that will brighten your day in 15 minutes
- Total Time: 27 minutes
- Yield: 24 cookies 1x
- Diet: Vegetarian
Description
These spring cookies are light and refreshing, perfect for the season.
Ingredients
- 2 cups all-purpose flour
- 1 cup sugar
- 1/2 cup butter, softened
- 1 large egg
- 1 teaspoon vanilla extract
- 1 teaspoon baking powder
- 1/2 teaspoon salt
- 1/2 cup chopped nuts (optional)
- 1/2 cup dried fruit (optional)
Instructions
- Preheat your oven to 350°F (175°C).
- In a bowl, cream together the butter and sugar.
- Add the egg and vanilla extract, mixing well.
- In another bowl, combine flour, baking powder, and salt.
- Gradually add the dry ingredients to the wet mixture.
- If desired, fold in chopped nuts and dried fruit.
- Drop spoonfuls of dough onto a baking sheet.
- Bake for 10-12 minutes or until lightly golden.
- Let cool on a wire rack.
Notes
- Store in an airtight container for freshness.
- Can be decorated with icing for a festive touch.
- Adjust sweetness by reducing sugar if desired.
- Prep Time: 15 minutes
- Cook Time: 12 minutes
- Category: Dessert
- Method: Baking
- Cuisine: American
Nutrition
- Serving Size: 1 cookie
- Calories: 150
- Sugar: 8g
- Sodium: 50mg
- Fat: 7g
- Saturated Fat: 4g
- Unsaturated Fat: 2g
- Trans Fat: 0g
- Carbohydrates: 20g
- Fiber: 1g
- Protein: 2g
- Cholesterol: 25mg
Keywords: spring cookies, seasonal cookies, dessert recipes