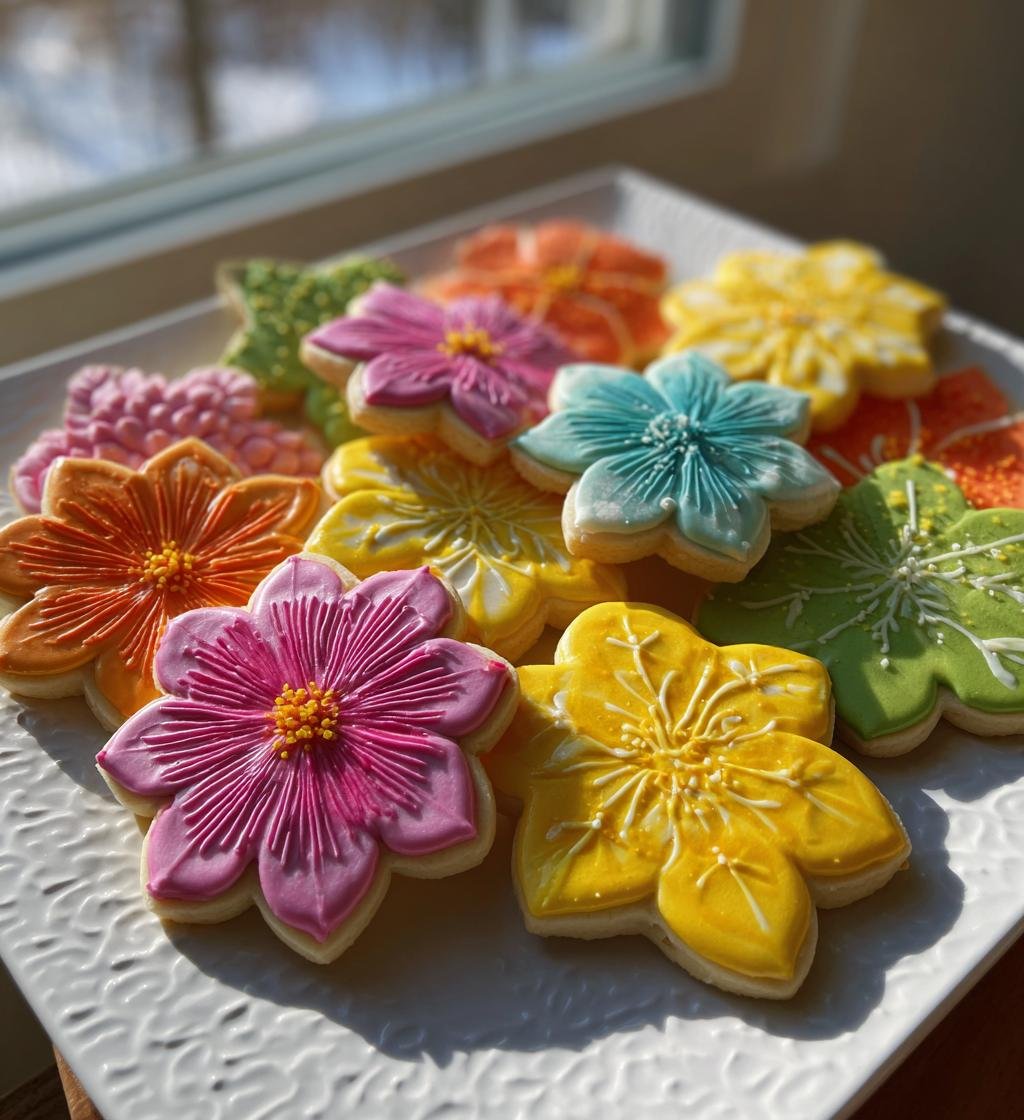
Ah, spring! It’s that magical season when everything bursts back to life, and I can’t help but feel inspired to bake! There’s just something about the vibrant colors of blooming flowers that gets my creative juices flowing in the kitchen. That’s why I absolutely adore making *spring flower cookies decorated* to resemble those beautiful blooms. Not only are they a feast for the eyes, but they also taste delightful—sweet and buttery with a hint of vanilla that just screams sunshine!
I remember the first time I made these cookies. It was a sunny Saturday morning, and my kids and I decided to take advantage of the gorgeous weather. We set up our flour-dusted kitchen table and rolled out the dough, laughing and chatting as we cut out flower shapes of all sizes. The best part? Watching their little faces light up as they decorated each cookie with colorful royal icing. It’s a tradition I cherish, and I love how these cookies bring everyone together. Trust me, once you whip up a batch of these gorgeous treats, you’ll understand why they’ve become a springtime favorite in our household!
Ingredients List
Here’s everything you’ll need to create those delightful *spring flower cookies decorated*. Gather these ingredients before you start baking:
- 2 cups all-purpose flour: This is the base of your cookies, giving them structure and a lovely crumb.
- 1/2 cup unsalted butter, softened: Softened butter is essential for creaming with sugar, resulting in a rich and tender cookie.
- 1 cup granulated sugar: This adds sweetness and helps achieve that beautiful golden color when baked.
- 1 large egg: A crucial binding agent, the egg helps hold everything together and adds moisture.
- 1 teaspoon vanilla extract: This adds a delightful flavor that complements the sweetness of the cookies.
- 1 teaspoon baking powder: This leavening agent ensures your cookies rise and have a nice, soft texture.
- 1/2 teaspoon salt: A pinch of salt enhances the overall flavor and balances the sweetness.
- Royal icing for decoration: This is your canvas for making those beautiful flower designs—get creative!
- Food coloring: Use this to tint your royal icing in vibrant spring colors that pop on your cookies.
How to Prepare Spring Flower Cookies Decorated
Step 1: Preheat the Oven
First things first, you’ll want to get your oven preheating to 350°F (175°C). Preheating is essential because it ensures that your cookies bake evenly and achieve that lovely golden color we all crave. So go ahead and turn that oven on now, while you prepare the dough!
Step 2: Cream Butter and Sugar
Next up, let’s cream together the softened butter and granulated sugar. This step is crucial for creating a light and fluffy texture in your cookies. I like to use a hand mixer, but you can totally do it by hand with a wooden spoon if you’re feeling adventurous! Beat the butter and sugar together until the mixture looks pale and fluffy—about 2-3 minutes will do the trick. You want it to have that whipped honey look, which means you’re on the right track!
Step 3: Mix in Egg and Vanilla
Now it’s time to add in your large egg and vanilla extract. Mix well until everything is combined. This is where the magic happens! The egg acts as a binding agent, giving the dough the moisture it needs. Make sure to scrape down the sides of the bowl to incorporate everything evenly. You’ll end up with a smooth mixture that smells absolutely heavenly!
Step 4: Combine Dry Ingredients
In a separate bowl, it’s time to combine your dry ingredients: the all-purpose flour, baking powder, and salt. Mix them together well; this ensures that the baking powder is evenly distributed, which is key for those lovely airy cookies. Mixing dry ingredients separately helps avoid lumps and clumping when you combine everything later. Trust me, it makes a difference!
Step 5: Combine Wet and Dry Mixtures
Now, gradually add the dry mixture to your wet ingredients. I like to do this in three parts, folding the flour in gently. This method helps prevent clumping and ensures a smooth dough. You want to mix just until everything is incorporated; overmixing can lead to tough cookies, and we definitely don’t want that!
Step 6: Roll Out Dough and Cut Shapes
Once your dough is ready, it’s time to roll it out! Lightly flour your surface and use a rolling pin to flatten the dough to about 1/4 inch thick. This thickness is perfect for getting those cute flower shapes. Use your favorite flower cookie cutter to cut out shapes. Don’t forget to gather the scraps and re-roll them—no cookie left behind!
Step 7: Bake the Cookies
Carefully place your flower-shaped cookies on a baking sheet lined with parchment paper. Bake them in your preheated oven for about 8-10 minutes. Keep an eye on them; you’ll know they’re done when the edges are lightly golden. They might look a bit soft when you take them out, but don’t worry—they’ll firm up as they cool!
Step 8: Cool and Decorate
Once baked, let your cookies cool on the baking sheet for a few minutes before transferring them to a wire rack. This cooling step is super important because you want them to be completely cool before decorating. Now, grab your royal icing and get creative! Use piping bags or a simple plastic sandwich bag with the corner snipped off to decorate your cookies in vibrant spring colors. Let the icing dry completely before stacking them up—this will keep your beautiful designs intact!
Nutritional Information
Now, let’s talk about what you’re getting with each delightful *spring flower cookie decorated*! Keep in mind that these values are estimated per cookie:
- Calories: 120
- Fat: 5g
- Saturated Fat: 3g
- Trans Fat: 0g
- Cholesterol: 20mg
- Sodium: 50mg
- Carbohydrates: 16g
- Fiber: 0g
- Sugar: 8g
- Protein: 1g
These cookies are sweet treats perfect for enjoying in moderation. So, while they’re a fun indulgence, remember to savor each bite!
Tips for Success
Here are my top tips to ensure your *spring flower cookies decorated* come out perfectly every time!
First off, pay attention to your dough consistency. It should be soft but not sticky. If it’s too sticky, sprinkle in a bit more flour, but be careful not to overdo it! A good test is to press your dough with your finger; it should bounce back but still feel pliable.
When decorating with royal icing, make sure it’s the right consistency. You want it to be flowable but not too runny—think of it like pancake batter. If it’s too thick, add a tiny bit of water, and if it’s too thin, mix in more powdered sugar. I love using piping bags for more control, but you can also use a plastic bag with a snipped corner for a quick fix!
And don’t forget about storage! Keep your cookies in an airtight container at room temperature. They’ll stay fresh for several days, but if you want to keep them longer, pop them in the freezer! Just make sure the icing is completely dry before stacking them to avoid any smudges. Trust me, these little beauties deserve to be enjoyed for as long as possible!
Variations on Spring Flower Cookies Decorated
The beauty of *spring flower cookies decorated* is that they offer endless opportunities for creativity! Why not experiment with different flavors? You can add a hint of lemon or almond extract to the dough for a refreshing twist. For a fun take, try incorporating chocolate chips or chopped nuts into the batter—just be mindful of the balance with the icing!
When it comes to decorating, let your imagination run wild! Use a variety of food coloring to create multi-colored flowers or even try marbling the icing for a unique look. You could also switch up the shapes—think daisies, tulips, or even butterflies. Another idea is to use edible glitter or sprinkles to give your cookies an extra touch of sparkle. The sky’s the limit, and each variation can make your spring gatherings even more festive!
FAQ Section
Q1: How should I store my decorated spring flower cookies?
To keep your *spring flower cookies decorated* fresh, store them in an airtight container at room temperature. They’ll stay delicious for about a week. If you want to keep them longer, pop them in the freezer. Just make sure the royal icing is completely dry before stacking them, so you don’t smudge those beautiful designs!
Q2: What can I use if I don’t have royal icing?
If royal icing isn’t your thing, you can use a simple glaze made from powdered sugar and milk. Mix about 1 cup of powdered sugar with 1-2 tablespoons of milk until smooth. This will give you a nice, sweet topping, but keep in mind it won’t harden as firmly as royal icing.
Q3: Can I make these cookies gluten-free?
Absolutely! To make your *spring flower cookies decorated* gluten-free, simply substitute all-purpose flour with a 1:1 gluten-free baking blend. Many blends work wonderfully in recipes like this, and you’ll still get that delightful texture we all love!
Q4: How can I adjust the sweetness of the cookies?
If you prefer less sweetness, you can reduce the amount of granulated sugar by about 1/4 cup. Just remember that this might slightly alter the cookie’s texture and color, but it’ll still taste great!
Q5: Can I use different colors for the icing?
Yes! One of the fun parts of decorating these cookies is experimenting with colors. Use food coloring to tint your royal icing in any shade you like. You can create vibrant spring flowers or even pastel designs for a softer look. The choice is entirely yours, and it makes each batch unique!

Spring Flower Cookies Decorated: 7 Steps to Joyful Baking
- Total Time: 30 minutes
- Yield: 24 cookies 1x
- Diet: Vegetarian
Description
Delicious cookies decorated to resemble spring flowers.
Ingredients
- 2 cups all-purpose flour
- 1/2 cup unsalted butter, softened
- 1 cup granulated sugar
- 1 large egg
- 1 teaspoon vanilla extract
- 1 teaspoon baking powder
- 1/2 teaspoon salt
- Royal icing for decoration
- Food coloring
Instructions
- Preheat your oven to 350°F (175°C).
- In a bowl, cream together the butter and sugar.
- Add the egg and vanilla, mixing well.
- In another bowl, combine flour, baking powder, and salt.
- Gradually add the dry ingredients to the wet mixture.
- Roll out the dough and cut into flower shapes.
- Place the cookies on a baking sheet.
- Bake for 8-10 minutes until lightly golden.
- Let cool and decorate with royal icing and food coloring.
Notes
- Store cookies in an airtight container.
- Use different colors for varied flower designs.
- Allow icing to dry completely before stacking.
- Prep Time: 20 minutes
- Cook Time: 10 minutes
- Category: Dessert
- Method: Baking
- Cuisine: American
Nutrition
- Serving Size: 1 cookie
- Calories: 120
- Sugar: 8g
- Sodium: 50mg
- Fat: 5g
- Saturated Fat: 3g
- Unsaturated Fat: 2g
- Trans Fat: 0g
- Carbohydrates: 16g
- Fiber: 0g
- Protein: 1g
- Cholesterol: 20mg
Keywords: spring flower cookies, decorated cookies, flower cookies