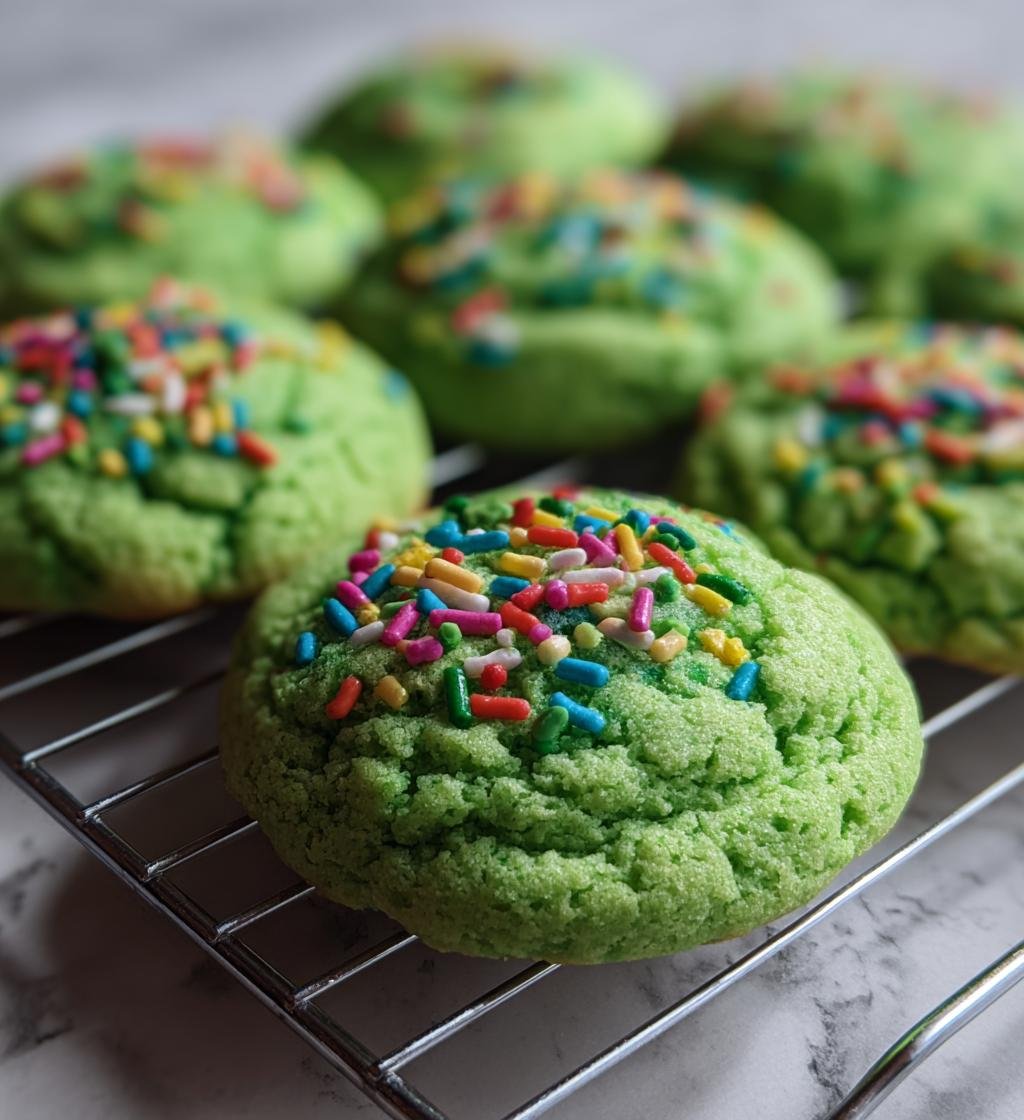
Ah, St. Patrick’s Day! It’s that magical time of year when everything turns a vibrant shade of green, and the spirit of fun fills the air. If you’re looking to add a sprinkle of joy to the festivities, you’ve come to the right place! I’m about to share my absolute favorite recipe for *St. Patrick’s Day cookies easy* enough for everyone to enjoy. These delightful treats not only look festive, but they’re also a blast to make! The aroma of freshly baked cookies combined with a hint of vanilla will have your kitchen smelling like a cozy Irish pub in no time. Plus, the best part? You can get the kids involved, turning your baking session into a joyful family activity. So, grab your mixing bowls, and let’s dive into this easy, fun recipe that’s sure to be a hit at your St. Patrick’s Day celebration!
Ingredients List
- 2 cups all-purpose flour
- 1 cup sugar
- 1/2 cup softened butter
- 1 egg
- 1 tsp vanilla extract
- 1/2 tsp baking powder
- 1/4 tsp salt
- Green food coloring (for that festive touch!)
- Sprinkles (optional, but highly recommended for extra fun!)
How to Prepare St. Patrick’s Day Cookies Easy
Now that we’ve gathered our ingredients, it’s time to get to the fun part: making these festive cookies! Follow along as I guide you through each step, ensuring your cookies come out perfectly every time.
Preheat and Prepare
First things first, let’s preheat that oven to 350°F (175°C). This step is crucial because you want your cookies to bake evenly and rise beautifully. While that’s warming up, grab some baking sheets and line them with parchment paper or a silicone mat. This little trick ensures that your cookies won’t stick, making cleanup a breeze. Trust me, future-you will thank you!
Creaming Butter and Sugar
Next, we’re going to cream together the softened butter and sugar in a large mixing bowl. This step is all about creating the right texture. You want to beat the butter and sugar until it’s light and fluffy—think of it as whipping up a cloud! This process incorporates air into the mixture, which gives your cookies that delightful chewy texture. Aim for about 2-3 minutes of mixing. Don’t rush this part; it’s where the magic happens!
Mixing Dry Ingredients
In a separate bowl, combine the flour, baking powder, and salt. Make sure to whisk them together well, as this helps distribute the baking powder evenly throughout the flour. This step is important to avoid clumps and ensure your cookies rise perfectly. Once combined, we’ll gradually add this dry mixture to the wet ingredients. Mix just until everything is combined—overmixing can lead to tough cookies, and we definitely want them soft and tender!
Coloring the Dough
Now comes the fun part—adding that festive green food coloring! Start with just a few drops and mix it in. You can always add more until you reach your desired shade. If you’re feeling adventurous, why not try using other colors for different holidays or occasions? The kids will love this part, and it makes the cookies even more exciting!
Baking Instructions
Once your dough is ready, it’s time to drop spoonfuls onto your prepared baking sheets, leaving some space between each cookie to allow for spreading. Pop them into the preheated oven and bake for about 10-12 minutes. Keep an eye on them! You’ll know they’re ready when the edges turn golden brown, and the centers look set but still soft. Let them cool on the baking sheet for a couple of minutes before transferring them to a wire rack. This will help maintain that chewy texture we love!
Tips for Success
- Measure Ingredients Accurately: Baking is a science! Use a kitchen scale or measuring cups and spoons to ensure you get the right amounts. Too much flour can lead to dry cookies, and too little can make them too gooey.
- Don’t Skip the Preheating: Always preheat your oven before baking. This helps your cookies rise properly and bake evenly—no one wants flat cookies, right?
- Chill the Dough (if you want): If you’re in a warm kitchen or want a thicker cookie, consider chilling the dough for about 30 minutes before baking. This helps prevent spreading and results in a fluffier cookie.
- Experiment with Sprinkles: While optional, sprinkles add a fun touch! Mix in or top your cookies with rainbow sprinkles to make them pop even more. It’s all about the festive spirit!
- Keep an Eye on Baking Time: Ovens can vary, so check your cookies a minute or two before the recommended baking time. They’re done when the edges are lightly golden, and the centers look slightly underbaked—trust me, they’ll firm up as they cool!
Variations
Now that you’ve mastered the basics of my *St. Patrick’s Day cookies easy* recipe, let’s talk about how you can switch things up and make these cookies your own! The beauty of this recipe is its versatility, so get ready to unleash your creativity!
Colorful Cookie Creations
While green is the star of the show for St. Patrick’s Day, why not try other colors for different holidays or occasions? Use red for Valentine’s Day, orange for Halloween, or pastel shades for Easter! Just remember to adjust the amount of food coloring to achieve the desired hue. Your cookies will look like a rainbow of fun!
Flavor Infusions
If you want to jazz things up a bit, consider adding different flavors to the mix. A teaspoon of almond extract can add a delightful twist, or try some lemon zest for a refreshing citrus kick. You could even fold in some mini chocolate chips or white chocolate chunks for a sweet surprise in every bite. Yum!
Fun Mix-Ins
Get adventurous with mix-ins! Nuts, like chopped pecans or walnuts, can add a nice crunch. Dried fruits, such as raisins or cranberries, introduce a chewy texture and a pop of sweetness. For a bit of spice, you could sprinkle in some cinnamon or nutmeg—just a pinch will do!
Frosting and Decorating
Take your cookies to the next level by adding a simple frosting on top! A basic buttercream can be tinted in fun colors and piped onto the cooled cookies for a decorative touch. You could also drizzle some melted chocolate over the top for an extra indulgent treat. And don’t forget the sprinkles—because who doesn’t love sprinkles?
With these variations, you can make your *St. Patrick’s Day cookies easy* recipe uniquely yours. So, roll up your sleeves, let your imagination run wild, and enjoy the delicious process of baking!
Storage & Reheating Instructions
Once you’ve baked your delightful St. Patrick’s Day cookies, you’ll want to make sure they stay fresh and tasty for as long as possible. Here’s how to store them properly and, if needed, how to reheat them for that fresh-out-of-the-oven experience!
Storing Your Cookies
The best way to store your cookies is in an airtight container. I recommend using a plastic or glass container with a tight-fitting lid to keep them soft and chewy. If you have extra cookies, you can layer them between sheets of parchment paper to prevent sticking. They’ll stay fresh at room temperature for about a week. But trust me, they probably won’t last that long because they’re just too delicious!
For Longer Storage
If you want to enjoy your cookies even later, you can freeze them! Simply place the cooled cookies in a single layer on a baking sheet and pop them in the freezer for about an hour. Once they’re firm, transfer them to a freezer-safe bag or container. This way, you can pull out a couple whenever you have a craving. Just make sure to label the bag with the date, so you know when they were made!
Reheating Your Cookies
When you’re ready to enjoy a cookie that tastes freshly baked, reheating is the way to go! Preheat your oven to 300°F (150°C) and place the cookies on a baking sheet. Warm them up for about 5-10 minutes, but keep an eye on them to ensure they don’t get too crispy. Alternatively, you can use the microwave for a quicker fix—just pop a cookie on a microwave-safe plate and heat it for about 10-15 seconds. This will bring back that soft, gooey goodness!
With these storage and reheating tips, you’ll be able to savor your *St. Patrick’s Day cookies easy* long after the festivities are over. Happy baking, and enjoy every delicious bite!
Nutritional Information
Here’s a quick look at the nutritional breakdown for each of these delightful St. Patrick’s Day cookies. Keep in mind that these values are estimates and can vary based on the specific ingredients you use and the size of your cookies.
- Calories: 120
- Fat: 6g
- Saturated Fat: 3g
- Trans Fat: 0g
- Cholesterol: 20mg
- Sodium: 50mg
- Carbohydrates: 15g
- Fiber: 0g
- Sugar: 8g
- Protein: 1g
These cookies are a fun treat, perfect for celebrating St. Patrick’s Day without too much guilt! Enjoy each bite knowing you’re indulging in a delightful, festive snack!
FAQ Section
Q1: Can I use other colors of food coloring besides green for these cookies?
Absolutely! While green is perfect for St. Patrick’s Day, you can use any food coloring to match different occasions. Just remember to adjust the amount until you reach the color you want. Think pink for a baby shower or red for Valentine’s Day! The kids will love experimenting with colors!
Q2: How do I know when my cookies are properly baked?
Great question! You’ll want to keep an eye on them while they bake. The cookies are done when the edges are lightly golden and the centers look set but still soft. They’ll continue to firm up as they cool, so don’t worry if they look a little underbaked when you take them out!
Q3: What can I do if my cookie dough is too sticky?
If your dough is too sticky, don’t panic! You can add a little more flour, one tablespoon at a time, until it reaches a workable consistency. Just be careful not to overdo it, as too much flour can make the cookies dry. A little stickiness is okay—it’s part of the fun!
Q4: Can I make these cookies ahead of time?
Definitely! You can prepare the dough ahead of time and refrigerate it for up to 2 days before baking. Just wrap it tightly in plastic wrap to prevent it from drying out. When you’re ready to bake, let it sit at room temperature for a few minutes before scooping and baking!
Q5: How do I make these cookies gluten-free?
If you want to make gluten-free *St. Patrick’s Day cookies easy*, you can substitute the all-purpose flour with a gluten-free flour blend. Just make sure it’s a 1:1 ratio blend that works well for baking. You may also want to add a little xanthan gum to help with texture if your blend doesn’t contain it. Enjoy the festivities without the gluten worry!
Print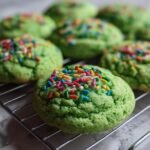
St. Patrick’s Day Cookies Easy: 5 Steps to Festive Joy
- Total Time: 27 minutes
- Yield: 24 cookies 1x
- Diet: Vegetarian
Description
Easy St. Patrick’s Day cookies that are fun and festive.
Ingredients
- 2 cups all-purpose flour
- 1 cup sugar
- 1/2 cup butter, softened
- 1 egg
- 1 tsp vanilla extract
- 1/2 tsp baking powder
- 1/4 tsp salt
- Green food coloring
- Sprinkles (optional)
Instructions
- Preheat your oven to 350°F (175°C).
- In a bowl, cream together butter and sugar.
- Add egg and vanilla extract, mix well.
- In another bowl, combine flour, baking powder, and salt.
- Gradually add dry ingredients to wet mixture.
- Add green food coloring until desired shade is reached.
- Drop spoonfuls of dough onto a baking sheet.
- Bake for 10-12 minutes or until edges are golden.
- Let cool and decorate with sprinkles if desired.
Notes
- Store cookies in an airtight container.
- Use different colors of food coloring for variety.
- Adjust baking time for softer or crunchier cookies.
- Prep Time: 15 minutes
- Cook Time: 12 minutes
- Category: Dessert
- Method: Baking
- Cuisine: Irish
Nutrition
- Serving Size: 1 cookie
- Calories: 120
- Sugar: 8g
- Sodium: 50mg
- Fat: 6g
- Saturated Fat: 3g
- Unsaturated Fat: 2g
- Trans Fat: 0g
- Carbohydrates: 15g
- Fiber: 0g
- Protein: 1g
- Cholesterol: 20mg
Keywords: st patricks day cookies easy