St. Patrick’s Day is one of those magical times of year when everything feels a little brighter, and everything green gets a pass! I can’t help but get excited about celebrating with my favorite *St. Patrick’s Day treats*. There’s something so delightful about a kitchen filled with the smell of fresh-baked goodies, especially when they’re dressed up in festive shades of green. It reminds me of childhood days spent crafting shamrocks and rainbows, all while nibbling on sweet, colorful desserts that my mom would whip up. These treats aren’t just desserts; they’re a way to bring family and friends together, to share stories, and to indulge in a little whimsy. Whether you’re throwing a party or simply want to brighten up your day, these festive delights will do the trick. Trust me, seeing the smiles on everyone’s faces when they take a bite is truly the best part! So roll up your sleeves, grab your mixing bowl, and let’s make some delicious memories this St. Patrick’s Day!
Ingredients for St Patrick’s Day Treats
Gathering the right ingredients is the first step to making these festive delights. Here’s what you’ll need:
- 2 cups all-purpose flour – a must for that perfect cake structure.
- 1 cup sugar – because we all need a little sweetness in our lives!
- 1/2 cup butter, softened – it adds richness and flavor, making everything better.
- 2 eggs – for binding and that delightful fluffiness.
- 1/2 cup milk – this adds moisture to keep your treats tender.
- 1 teaspoon vanilla extract – a splash of vanilla always enhances the flavor.
- 1/2 teaspoon baking powder – this is what helps your treats rise and stay light.
- 1/4 teaspoon salt – enhances the sweetness and balances the flavors.
- Green food coloring – because we want everything to scream “St. Patrick’s Day!”
- Sprinkles for decoration – the final touch that makes them irresistible!
These simple ingredients come together to create something really special, and I can’t wait for you to try it!
How to Prepare St Patrick’s Day Treats
Now that you’ve gathered all your ingredients, it’s time to dive into the fun part – preparing these delightful St. Patrick’s Day treats! I promise this process is just as enjoyable as the end result. Let’s get started!
Step-by-Step Instructions
- Preheat your oven: Start by preheating your oven to 350°F (175°C). This step is crucial because a properly heated oven ensures that your treats bake evenly and rise beautifully.
- Cream the butter and sugar: In a large mixing bowl, cream together the softened butter and sugar until it’s light and fluffy. This should take about 2-3 minutes. You’ll know it’s ready when it looks pale and airy!
- Add the eggs: Crack in the eggs one at a time, mixing well after each addition. This helps to incorporate air and gives your treats that lovely fluffy texture.
- Stir in milk and vanilla: Pour in the milk and add the vanilla extract. Give it a good stir until everything is well combined.
- Mix the dry ingredients: In another bowl, whisk together the flour, baking powder, and salt. This helps to evenly distribute the leavening agent throughout the flour.
- Combine wet and dry: Gradually add your dry mixture to the wet mixture. It’s best to do this in two or three parts, mixing gently until just combined. Overmixing can lead to dense treats, and we don’t want that!
- Add the green color: Now comes the fun part! Add a few drops of green food coloring to the batter. Mix until you achieve your desired shade of green. Feel free to go bold – it’s St. Patrick’s Day after all!
- Pour into the pan: Pour the batter into a greased baking pan, smoothing the top with a spatula to ensure even baking.
- Bake: Pop your pan into the preheated oven and bake for 25-30 minutes. You’ll know they’re ready when a toothpick inserted in the center comes out clean. Keep an eye on them to prevent overbaking!
- Cool and decorate: Once baked, let your treats cool in the pan for about 10 minutes before transferring them to a wire rack. Once cooled completely, go wild with sprinkles for that extra festive touch!
And just like that, your St. Patrick’s Day treats are ready to bring joy and color to your celebration! Enjoy the process and, of course, the delicious results!
Why You’ll Love These St Patrick’s Day Treats
- Quick to make: These treats come together in about 45 minutes, making them perfect for last-minute celebrations or spontaneous baking sessions!
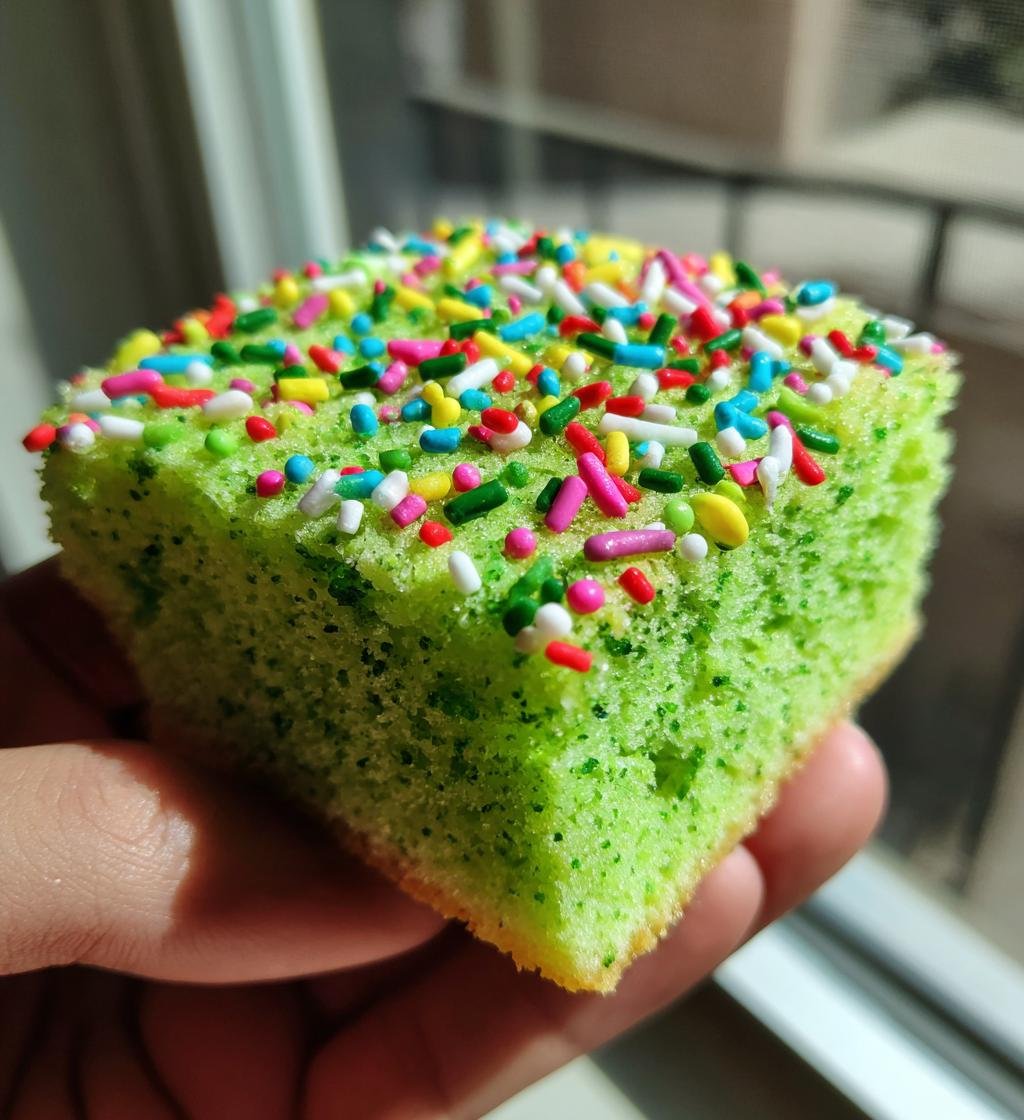
- Festive appearance: With their vibrant green color and cheerful sprinkles, they’re sure to brighten up any St. Patrick’s Day gathering.
- Delicious flavor: The combination of buttery sweetness and a hint of vanilla makes these treats irresistible to everyone – trust me, they’ll disappear in no time!
- Fun activity for families: Baking together creates wonderful memories. Kids love getting involved, especially when it comes to mixing the batter and decorating with sprinkles!
- Perfect for sharing: Whether you’re bringing them to a party or enjoying them at home, these treats are a delightful way to spread some cheer and celebration.
Tips for Success with St Patrick’s Day Treats
To ensure your St. Patrick’s Day treats turn out absolutely fabulous, here are some handy tips I’ve gathered over the years. Trust me, these little nuggets of wisdom can make a big difference!
- Ingredient substitutions: If you’re short on butter, you can use coconut oil or vegetable oil. Just keep in mind that the flavor may change slightly. For a dairy-free option, substitute milk with almond or oat milk – it works like a charm!
- Room temperature ingredients: Make sure your butter and eggs are at room temperature before you start. This helps them blend more easily and contributes to a fluffier texture in your treats.
- Don’t skip the creaming step: Creaming the butter and sugar until light and fluffy is crucial. This process adds air to the batter and helps your treats rise beautifully. Take your time with it – it’s worth it!
- Check your oven temperature: Ovens can be tricky! If you’re unsure about your oven’s accuracy, I recommend using an oven thermometer. This ensures your treats bake at the right temperature, preventing them from being undercooked or overbaked.
- Experiment with flavors: Want to add a twist? Try adding a teaspoon of mint extract for a refreshing flavor that pairs wonderfully with the green theme! Or, if you’re a chocolate lover, fold in some mini chocolate chips for extra deliciousness.
- Decorating fun: Let your creativity shine when it comes to sprinkles! Use a mix of gold, silver, or even rainbow-colored sprinkles to add a dazzling touch to your treats. It makes them even more festive!
With these tips in your back pocket, you’ll be well on your way to creating St. Patrick’s Day treats that not only look fantastic but taste amazing too. Happy baking!
Frequently Asked Questions about St Patrick’s Day Treats
Got questions about these festive St. Patrick’s Day treats? Don’t worry, I’ve got you covered! Here are some common inquiries I hear, along with my answers to help you out.
- Can I use a different type of flour? Absolutely! While all-purpose flour works perfectly, you can experiment with cake flour for a lighter texture or even gluten-free flour if you have dietary needs. Just make sure to check the packaging for any specific instructions!
- What if I don’t have green food coloring? No problem! You can use natural alternatives like matcha powder or spirulina for a green hue, or simply skip the coloring altogether. Your treats will still taste amazing, even if they aren’t green!
- How should I store these treats? To keep your St. Patrick’s Day treats fresh, store them in an airtight container at room temperature. They’ll stay good for about 3-4 days. If you need to keep them longer, you can freeze them for up to a month. Just make sure to wrap them tightly!
- Can I make these treats ahead of time? Yes, you can! You can prepare the batter a day in advance and store it in the fridge. Just give it a good stir before baking. If you bake them ahead, let them cool completely before storing to prevent moisture buildup.
- Are these treats suitable for kids? Absolutely! These St. Patrick’s Day treats are perfect for kids, who will love both the fun green color and the sweet flavor. Plus, they can join in on the mixing and decorating fun!
I hope these answers help you whip up the best St. Patrick’s Day treats ever! If you have any other questions, feel free to reach out. Happy baking!
Nutritional Information for St Patrick’s Day Treats
Here’s a quick look at the estimated nutritional information for each serving of these delightful St. Patrick’s Day treats. Keep in mind that these values are estimates and can vary based on exact ingredients and portion sizes:
- Serving Size: 1 piece
- Calories: 200
- Fat: 8g
- Saturated Fat: 5g
- Unsaturated Fat: 2g
- Trans Fat: 0g
- Cholesterol: 40mg
- Sodium: 150mg
- Carbohydrates: 30g
- Fiber: 1g
- Protein: 2g
- Sugar: 15g
These treats are certainly a sweet indulgence, perfect for celebrating St. Patrick’s Day with family and friends. Enjoy in moderation, and don’t forget to share the joy!
Serving Suggestions for St Patrick’s Day Treats
Now that you’ve baked up a batch of these delightful St. Patrick’s Day treats, it’s time to think about how to serve them! Presentation can really elevate your festive gathering, so here are some fun ideas that will make your treats shine:
- Rainbow Platter: Arrange your treats on a colorful platter surrounded by mini chocolate gold coins and vibrant rainbow fruit skewers. It adds a cheerful touch and ties in perfectly with the St. Patrick’s Day theme!
- St. Patrick’s Day Table Decor: Place your treats in cute green or gold cupcake liners and set them out on a table decorated with shamrocks, leprechaun figurines, and twinkling fairy lights for that magical feel.
- Drink Pairings: Serve these treats alongside Irish cream milkshakes or a refreshing mint-infused iced tea. Both options complement the sweet flavors beautifully, making for a delightful treat experience.
- Gift Bags: Consider packing individual treats in clear bags tied with green ribbons. These make for lovely party favors that guests can take home, spreading the festive spirit even after the celebration ends!
- Interactive Decorating Station: Set up a decorating station where guests can add their own sprinkles or edible glitter to their treats. It’s a fun way to engage everyone and allows for a personal touch!
With these serving suggestions, your St. Patrick’s Day treats will not only taste amazing but look stunning too! Enjoy making memories and sharing joy with every bite!
Storage & Reheating Instructions
After indulging in your delicious St. Patrick’s Day treats, you might find yourself with a few leftovers (if you’re lucky!). Proper storage is key to keeping them fresh and tasty for days to come. Here’s how to make sure your lovely green treats stay delightful!
- Storing Leftovers: Let your treats cool completely before storing them. This step helps prevent moisture from building up, which can make them soggy. Place them in an airtight container at room temperature, and they’ll stay fresh for about 3-4 days. If you want to keep them longer, you can freeze them!
- Freezing for Later: To freeze, wrap each piece tightly in plastic wrap and then place them in a freezer-safe bag or container. They can be frozen for up to a month. Just remember to label the bag with the date so you know when they were made!
- Reheating Tips: When you’re ready to enjoy your treats again, you can either let them thaw at room temperature for a couple of hours or pop them in the microwave for about 10-15 seconds until warm. Be careful not to overheat them, though, as that can make them tough! If you prefer them warm and with a little extra festivity, a light drizzle of icing or a sprinkle of fresh sprinkles on top can elevate the experience!
With these simple storage and reheating instructions, you’ll be able to savor your St. Patrick’s Day treats long after the celebrations are over. Enjoy every bite!
Print
St Patrick’s Day Treats: 7 Magical Recipes for Joy
- Total Time: 45 minutes
- Yield: 12 servings 1x
- Diet: Vegetarian
Description
Celebrate St. Patrick’s Day with these fun and festive treats.
Ingredients
- 2 cups all-purpose flour
- 1 cup sugar
- 1/2 cup butter, softened
- 2 eggs
- 1/2 cup milk
- 1 teaspoon vanilla extract
- 1/2 teaspoon baking powder
- 1/4 teaspoon salt
- Green food coloring
- Sprinkles for decoration
Instructions
- Preheat your oven to 350°F (175°C).
- In a bowl, cream together butter and sugar.
- Add eggs one at a time, mixing well after each.
- Stir in milk and vanilla extract.
- In another bowl, combine flour, baking powder, and salt.
- Gradually add dry ingredients to the wet mixture.
- Mix in green food coloring until desired color is achieved.
- Pour batter into a greased baking pan.
- Bake for 25-30 minutes or until a toothpick comes out clean.
- Let cool and decorate with sprinkles.
Notes
- Use different shades of green for a fun effect.
- Try adding mint extract for a minty flavor.
- Prep Time: 15 minutes
- Cook Time: 30 minutes
- Category: Dessert
- Method: Baking
- Cuisine: Irish
Nutrition
- Serving Size: 1 piece
- Calories: 200
- Sugar: 15g
- Sodium: 150mg
- Fat: 8g
- Saturated Fat: 5g
- Unsaturated Fat: 2g
- Trans Fat: 0g
- Carbohydrates: 30g
- Fiber: 1g
- Protein: 2g
- Cholesterol: 40mg
Keywords: st patrick's day treats, festive desserts, green treats